DeepSeek Harness Tutorial: Plugin-Based AI Agents from Install to Advanced
A zero-basics install and plugin onboarding tutorial for the DeepSeek Harness plugin-based Agent framework.
The article introduces DeepSeek Harness, DeepSeek's official open-source AI Agent framework built on an "everything is a plugin" architecture, where model access, tool calling, memory management, and Agent runtime logic are all decoupled into replaceable modules. It's MIT-licensed and has hundreds of thousands of GitHub stars, with local folder read/write as its key advantage over the web chat version. The tutorial covers installing Node.js (22+ recommended) and the Harness client, plus three plugin installation methods—AI self-install (token-consuming), plugin marketplace (zero-credit), and command-line (more technical). Advanced topics include knowledge base management, video generation, AI fish farming, and connecting to QQ and WeChat, with a warning about third-party plugin source and permission risks.
DeepSeek's official open-source AI Agent framework, DeepSeek Harness, uses an "everything is a plugin" architecture to decouple model access, tool calling, memory management, and Agent runtime logic into replaceable modules. A step-by-step tutorial from a Bilibili creator walks through the entire onboarding path, from zero-basics environment setup to hands-on use of the plugin marketplace.
Why It's Worth Your Attention: The Capability Frontier of a Plugin Architecture
DeepSeekAd Harness has already accumulated hundreds of thousands of stars and tens of thousands of forks on GitHub, placing it among the most-watched open-source AI Agent projects. It uses the MIT license, so you're free to use and extend it, and it supports flexible integration with different models.
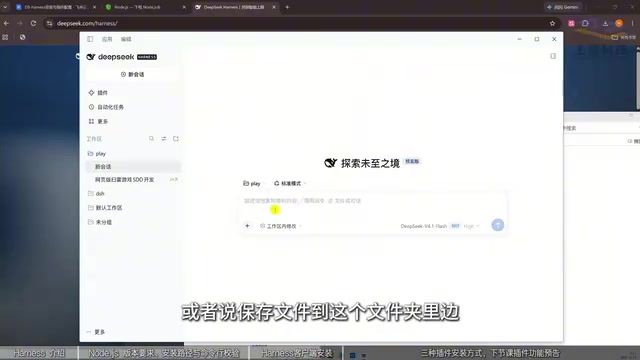
Compared with the web-based DeepSeek chat window, the key difference in the Harness client is local file system access—you can add a local folder and let the AI read, modify, and save files to that directory, something a purely online service can't do.
Its real strength lies in the plugin system. From model access, tool calling, and memory management to the Agent's runtime logic, the entire system can be composed, replaced, and extended through plugins. This means users are no longer just using an AI tool with fixed features—they can build their own agent system on demand. Code development, office automation, file processing, multi-Agent collaboration, and connecting to Skills and MCP extensions all fall within the framework's capabilities.
The fundamental difference between an Agent framework and an ordinary chatbot is the "loop": a chatbot is single-turn Q&A, while an Agent repeatedly executes a cycle of "think—call tools—observe results" around a goal until the task is complete. To make this loop work, four types of components are needed—a model for reasoning, tools for interacting with the outside world (reading/writing files, calling APIs), a memory module for remembering context, and runtime logic for orchestrating and scheduling all of the above. Harness turns all of these components into pluggable modules, effectively opening up the Agent's "brain," "hands and feet," "memory," and "scheduler" for users to replace. That's why it can cover such vastly different scenarios as code development, office automation, and multi-Agent collaboration.
Step One: Preparing the Node.js Environment
Installation happens in two stages. The first stage is installing Node.js, because a large number of AI tools (including Claude Code and others) run on the Node.js environment.
The creator's key reminder: Node.js version should preferably be 22 or above, not lower than 22. The official download page automatically adapts the installer to Windows or Mac based on your operating system. The MSI format can be installed with a direct click, while the Zip package requires manual extraction.
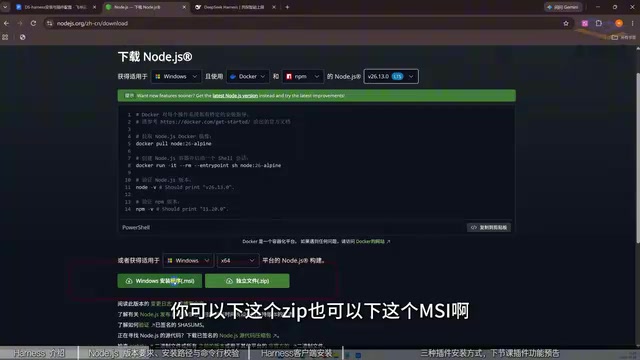
It's recommended to change the installation path to the D drive rather than the C drive, for two reasons: first, the installation itself takes up space; second, it will generate a large number of cache files later, and putting them on the system drive can easily fill up the C drive. Just click Next all the way to the end.
After installation, you need to verify. Open the command line (type CMD in the Run box to find it), enter the version query command with a space, and press Enter. If a version number appears and is roughly not lower than 20, the environment is ready.
Node.js is a JavaScript runtime built on Chrome's V8 engine that lets JavaScript run locally outside the browser. A large number of AI command-line tools and clients (such as Claude Code and the CLIs of various Agent frameworks) rely on the runtime and npm package manager it provides for distribution and installation. The version number matters because newer versions typically bundle a newer V8 engine and APIs, and some tools call features that don't exist in older versions—too low a version will directly cause installation failure or runtime errors. The tutorial's recommendation of 22 or above falls within the current Long-Term Support (LTS) range, balancing stability and new features; if the version number shown during verification is around 20, it may barely work, but upgrading to 22 is still recommended to avoid compatibility risks.
Step Two: Installing the Harness Client
On the Harness download page you can find the client file for your system; Windows users should choose the Windows version. The installation location should likewise be on the D drive. Click Install Now, and when it's done, the DeepSeek Harness interface opens.
The interface layout is similar to the web chat window, except it adds local folder mounting capability and a model selection entry—several DeepSeek models are visible here.
Three Plugin Installation Methods, Choose as Needed
Plugins are the core value of this framework, and the tutorial offers three paths with different levels of difficulty and cost.
Method 1: Let the AI Install It Itself
If you already know the plugin name, send the GitHub link directly to the AI in the chat window and let it handle the installation. This is the easiest approach, but it consumes tokens and credits.
Method 2: Plugin Marketplace, Zero Credit Cost
Click "Add Plugin," enter the plugin name (e.g., DSH market), click Install after the system detects it, then click "Launch Now" to enter the plugin marketplace. The marketplace entry is located under "More" → "Settings," and any installed plugin marketplace will appear here. The marketplace contains a huge number of plugins and supports search and filtering, plus a featured section showcasing various useful widgets and desktop pets—one click and they're installed.
Method 3: Command-Line Installation
Take a vision plugin as an example—native DeepSeek can't read local images or recognize image content, but with this plugin installed it can determine how many people are in a picture and what each person is wearing. To install, find the installation command at the bottom of the plugin's GitHub page, click the copy button, paste it into the command line, and run it; the interface will show installation progress.
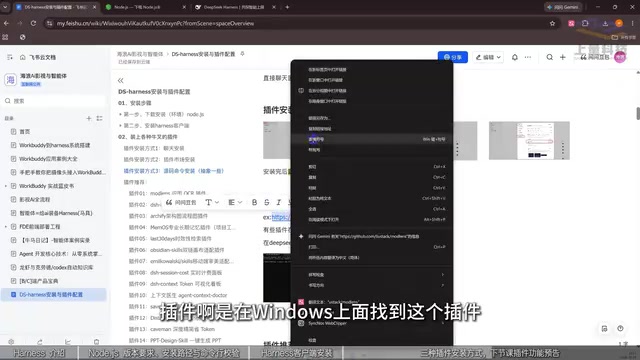
The creator admits the command-line method can feel abstract to some users and recommends prioritizing the first two methods. If you don't know what plugins are available, just ask DeepSeek for a list of popular, useful plugins and pick from there.
MCP (Model Context Protocol) is an open protocol that lets AI models connect to external tools and data sources in a standardized way—think of it as the "USB interface" of the AI world: tool providers expose capabilities according to the protocol, Agent-side systems call them according to the protocol, and neither side needs to build a separate adapter for the other. Skills, meanwhile, package the processing flows and knowledge for specific tasks into reusable capability bundles that Agents can load when needed. The relationship between the two and the plugin system is: plugins are responsible for getting capabilities into the framework, while MCP and Skills are responsible for making those capabilities understood and invoked by the model in a unified format. Understanding this layer explains why Harness's plugin marketplace can expand so quickly—ecosystem contributors only need to write one capability according to the standard, and it can be reused by every Agent using the framework.
Advanced Techniques Covered in the Tutorial
According to the creator's plan, this course reorganizes the knowledge system from basic architecture to advanced features, and from the plugin ecosystem to practical applications. Upcoming content will cover: having Harness read Bilibili content and import it into a knowledge base for management, generating videos, organizing knowledge directories, and the community-favorite "AI fish farming"玩法 (gameplay)—from raising big fat fish to training agents with different personalities. It also includes scenarios for connecting to chat software like QQ and WeChat to converse with others.
The course isn't positioned as merely "learn to install and use it," but as understanding how AI Agents work and mastering how to build, tune, and extend agents. For zero-basics users and advanced players who want to dig deeper, this path offers a practical learning framework.
Editor's Observations
The value of this content lies in breaking the abstract concept of an "Agent framework" into actionable steps. A plugin architecture means the capability frontier isn't defined by the official team but by the ecosystem and users themselves—this is both the source of flexibility and the reason the onboarding barrier is objectively higher than with out-of-the-box chat tools. The tutorial starts with tedious but necessary steps like environment configuration, a pragmatic approach for zero-basics users.
One caveat: third-party plugins in the marketplace vary in quality, so before installing you should pay attention to the source and permission scope, especially for plugins that involve local file read/write and image recognition.
One-line Summary
A zero-basics installation and plugin onboarding tutorial for the DeepSeek Harness plugin-based Agent framework.
Paragraph Summary
The article introduces DeepSeek Harness, DeepSeek's official open-source AI Agent framework, whose core is an "everything is a plugin" architecture: model access, tool calling, memory management, and Agent runtime logic are all decoupled into replaceable modules. It uses the MIT license and has already reached hundreds of thousands of GitHub stars. Compared with the web version of chat, the client's biggest difference is direct read/write access to local folders. The tutorial provides a complete onboarding path: first install Node.js (version 22 or above recommended) on a non-system drive, then install the Harness client. There are three ways to install plugins—letting the AI install them itself (consumes tokens), installing through the plugin marketplace (zero credits), and command-line installation (more technical). Advanced content covers knowledge base management, video generation, AI fish farming, and connecting to QQ, WeChat, and other scenarios. The editor also reminds readers to watch out for the source and permission risks of third-party plugins.
Related articles
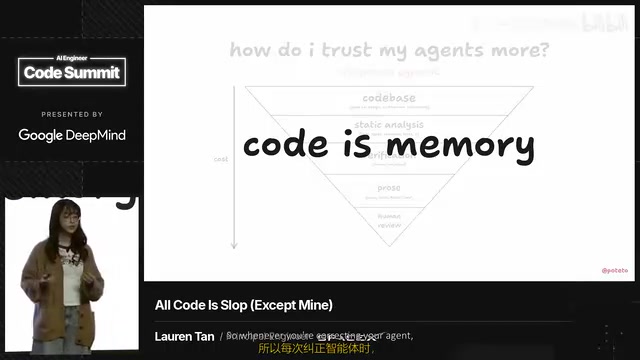
How the Grok Team Hits 11,000 PRs a Month: Replacing Manual Review with Deterministic Constraints
Inside the Grok team's formula for 11,000 monthly PRs at a 0.5% rollback rate: Lint rules, type systems, and formal verification as deterministic constraints.

Is Spacetime Made of Something? Six Possible Answers from Quantum Gravity
Is spacetime made of something? This article surveys the main candidate answers from quantum gravity: spacetime may be fundamental, geometry quantized, causal relations prior to distance, spacetime an emergent state of matter, geometry derived from string theory, or no spacetime atoms needed at all.
After GTA 6, Where Does the Game Industry Go?
The Vergecast talks with Game File's Stephen Totilo about GTA 6's impact on gaming: billion-dollar budgets, console market struggles, cloud gaming tests, and the future of microtransactions—and whether it marks the end of an era.