Gemini CLI in Practice: An AI Coding Agent in Your Terminal

Google Gemini CLI is a terminal AI agent tool that can directly read and write projects, execute commands, and auto-debug.
The article introduces Gemini CLI from Google: a command-line AI agent that embeds the Gemini model in the terminal, capable of reading project files, executing commands, modifying code, and running tests, forming a loop of write code—run tests—locate errors—fix. Installation is done globally via npm, and authentication supports Google account, Gemini API Key, and Vertex AI. The hands-on demo uses /plan to plan first and then execute in phases, leveraging permission controls to build a task management app from scratch. Three advanced use cases include codebase analysis, automatic debugging, and persisting project context with GEMINI.md. On exit, it outputs token consumption and tool call statistics to help manage costs.
What Is Gemini CLI?
Gemini CLI is a command-line AI agent tool from Google that embeds the capabilities of the Gemini model directly into your terminal. Unlike a web-based chatbot, it's not just a tool that "generates code for you to copy and paste"—it can directly read project files, execute commands, modify code, run tests, and automatically catch and fix errors.
According to analysis from a YouTube tech channel, CLI stands for Command Line Interface, where users operate by typing commands rather than clicking with a mouse. Gemini CLI combines this interaction model with AI: you type natural language instructions into the terminal, and after understanding them, it performs operations directly in your project directory.
The key distinction lies in the "agent" attribute: an ordinary chatbot is only responsible for generating content, whereas an agent autonomously completes the entire loop—writing code, running tests, detecting failures, locating errors, and proposing fixes.
Installation and Authentication
Global Installation via npm
The most convenient approach is using Node.js's npm package manager. After confirming that Node.js is installed on your system, run the global install command to get Gemini CLI onto your machine. Once installed, simply type gemini in the terminal to start it.
npm and Node.js: npm (Node Package Manager) is a package management tool installed alongside Node.js and is the world's largest software registry. When you run npm install -g @google/gemini-cli, the -g means global installation, which links the executable into the system PATH so you can invoke the gemini command directly from any directory. If Node.js isn't installed, download the LTS version from the official website first; after installation, verify with node -v and npm -v that the versions are available. Globally installed packages are also upgraded via npm, and removed with npm uninstall -g. In scenarios where global installation isn't convenient, you can also use npx to run it temporarily without a permanent install.
Three Authentication Methods
On first launch, you'll be asked to authenticate with three options: Google account sign-in, Gemini API Key, and Vertex AI. The video's author recommends the Gemini API Key—go to Google AI Studio to create a key, paste it in, and you're done—the simplest process.
Gemini API Key vs. Vertex AI: The Gemini API Key is the lightest-weight option for individual developers, generated with one click in Google AI Studio, billed by usage, with a free tier for trial use—ideal for quick starts and small-scale projects. Vertex AI, on the other hand, is Google Cloud's enterprise-grade machine learning platform, with authentication relying on Google Cloud projects, service accounts, and IAM permissions. It supports compliance capabilities such as data residency and VPC-SC, bills through Cloud billing, and suits teams and production environments. Google account sign-in sits between the two, using personal subscription quotas and requiring no key management. Which to choose mainly depends on usage scale, compliance requirements, and whether you already have Google Cloud infrastructure.
Hands-On: Building a Task Management App in One Minute
The video demonstrates a complete development workflow: building a task manager based on HTML5, CSS3, and JavaScript from scratch with Gemini CLI.
Plan First, Then Act
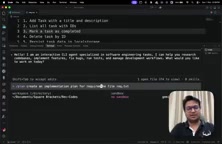
The key technique is using the /plan command to enter plan mode. In this mode, Gemini doesn't write code directly; instead, it first generates the project structure and a phased implementation plan. The author emphasizes: make sure to read the plan before confirming execution—many users skip this step and let the AI write code directly, which is actually less efficient.
In the actual demo, Gemini reads the user-written requirement.txt and outputs a requirements list, directory structure (index.html, src, test, readme, package.json), and a detailed phased implementation plan.
Phased Execution and Permission Control
After confirming the plan, you can have Gemini implement it step by step by phase. Each operation requests permission—allow once, allow for this session, or auto-accept. For simple tasks you can enable auto-accept; for complex projects, it's advisable to confirm item by item.
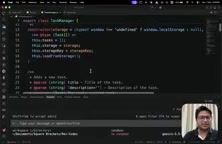
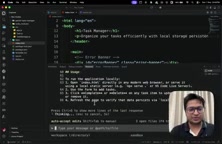
In the demo, Gemini completed package.json creation, dependency installation, HTML/CSS/JS code generation, and unit test execution in just a few minutes. The resulting app supports adding and deleting tasks, marking completion, filtering by status, and persisting data via localStorage.
Three Advanced Use Cases
1. Codebase Analysis
When facing an unfamiliar project, you can open a new terminal session and have Gemini analyze the project structure, the purpose of each file, and how it works. The video's author notes that this capability is especially useful for enterprise-level projects or when taking over someone else's code—many developers can build an app but can't explain what's happening inside it.
2. Automatic Debugging
In the demo, the author deliberately introduced a variable naming error into the code (task vs. tasks mismatch). After running the tests, Gemini immediately located the failing test case, pointed out that line 14 needed the plural form, and provided a fix suggestion.
3. Persisting Project Context with GEMINI.md
This is the feature the author values most. By creating a GEMINI.md file, you can persist project analysis information, tech stack conventions, testing requirements, and more. The next time you run Gemini CLI, it treats this file directly as the single source of truth, with no need to rescan the entire codebase—saving tokens and ensuring consistency.
In the video, the author has Gemini write the project analysis results into GEMINI.md and emphasizes: rather than repeatedly restating the same instructions in conversation, it's better to write them into this file once.
The Overlooked Token Bill
When you exit a session, Gemini CLI outputs a detailed summary: session ID, number of tool calls, success rate, code change volume, and most critically, token consumption—input tokens, output tokens, and cache hit rate.
The author considers this a differentiating advantage of Gemini CLI over some competitors: tokens are the "currency" of the AI era, and developers need to know the cost of each session. With this bill, you can optimize prompts, control context size, and avoid burning through your quota without realizing it.
Use Cases and Recommendations
Gemini CLI is best suited for three types of work: repetitive implementation tasks, quickly understanding unfamiliar codebases, and troubleshooting and debugging existing projects. It won't replace a developer's judgment on architecture and quality; rather, it frees human effort from mechanical labor.
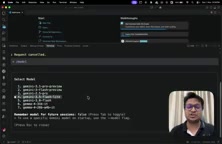
Advice for first-time users: start with small projects to get familiar with slash commands like /plan, /model, and /auth; for complex tasks, stick to phased progress, verifying each phase before continuing; and establish GEMINI.md early to capture project conventions.
Background Notes
Context Window and Token Costs: For each inference, a large model can only "see" a limited context window, and everything in it—system prompts, conversation history, file contents read in—is measured and billed in tokens. Without GEMINI.md, the agent must rescan and read in a large number of source files every session; this content continuously occupies the context, which both drives up input token costs and may crowd out genuinely useful information. GEMINI.md acts like a condensed "project manual," distilling stable information such as the tech stack, directory conventions, and test commands into a small number of tokens, letting the model achieve equal or even better understanding within a smaller context—thereby reducing costs and improving response consistency.
Related articles

64 Releases in 40 Days: How Strata Uses Release Velocity to Define Its AI Local Inference Roadmap
Strata shipped 64 releases in 40 days with 460k+ characters of notes. From 0.1.0 to 0.2.10, a three-step path: make it run, make it fast, make it trustworthy.
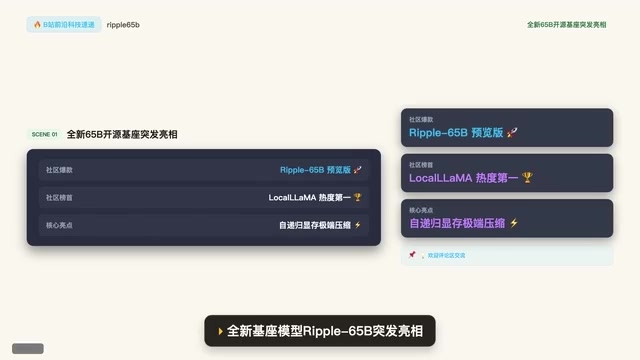
Ripple-65B Open-Source Model Tops Community Charts
Ripple-65B open-source LLM debuts atop community charts, using a self-recursive architecture to slash long-context KV cache for low-latency hundred-billion-scale inference on ordinary GPUs, with preview weights, quantized files, and one-click Olema & VLM deployment.

Deploy Open-Source Video Model MiniMax H3 Locally in 5 Minutes and Skip Cloud Generation Fees
Bilibili creator tests local deployment of open-source video model MiniMax H3: three-step ComfyUI install, 5-minute setup, no coding. Same prompt generates in 2 minutes locally vs 4 minutes online with queuing, saving about 30 RMB per 15-second 720P video. Includes VRAM requirements and RTX 5080 test results.