Getting Started with Claude Code: A Complete Hands-On Installation and Setup Guide

A complete hands-on guide to installing and configuring Claude Code from scratch for beginners.
This beginner-friendly guide walks through the entire Claude Code setup process: installing Node.js and Git Bash, using npm to install Claude Code, configuring a network proxy for users in China, and setting up API Key authorization—so newcomers can sidestep every common pitfall in one go.
Why Claude Code Is Worth Learning from Scratch
Claude Code is a command-line AI programming tool released by Anthropic, and it's becoming an efficiency powerhouse for a growing number of developers. Unlike traditional code-completion plugins, it's an intelligent terminal assistant that can understand project context and autonomously execute tasks. Based on a beginner-friendly hands-on tutorial, this article walks through the complete configuration process for Claude Code—from environment preparation to a successful login—helping newcomers sidestep common pitfalls in one go.
The full learning path is organized into six modules: quick start and configuration, core mode switching, CLAUDE.md global memory, session management, resource monitoring and batch tasks, and common pitfalls plus advanced tips. This article focuses on the first and most critical module—installation and configuration—because if your environment isn't set up properly, none of the subsequent hands-on work can even begin.
Step 1: Set Up the Node.js Runtime Environment
Claude Code is a command-line tool that runs on Node.js, so the first thing to do is make sure you have an appropriate version of Node.js installed locally. Here are the specific recommendations:
- Prefer the LTS (Long-Term Support) version, which offers greater stability and receives continuous official maintenance and updates;
- Use at least version 20 or higher, because Claude Code is a new tool and older versions can easily cause compatibility issues;
- The tutorial author uses version 22.11, which you can use as a reference.
Linux, macOS, and Windows are all supported. After installation, run node -v and npm -v to verify—if you see the version numbers printed correctly, your Node environment is ready.
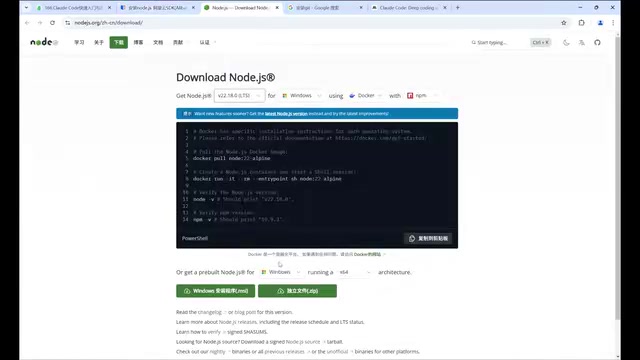
Windows users have two installation options: first, download the MSI installer, which automatically configures the environment variables and is easier to use; second, download the ZIP package, which requires manually configuring environment variables but offers more flexibility. macOS users should download the PKG or GZ package, and Linux users should choose the tar.gz package.
Step 2: Install Git and the Bash Terminal
This step is easily overlooked but absolutely essential. When Claude Code executes tasks, it needs to invoke the Bash command-line terminal, and on Windows, this Bash environment is provided by the Git Bash that comes bundled with Git.
After installing Git, run git version to verify (there are no special version requirements—just install a recent version). The core purpose of installing Git is to obtain the bash.exe executable located in its installation directory—it essentially simulates a mini Linux-like terminal on Windows, supporting Linux commands such as pwd.
If you don't configure the Git Bash environment variables, you'll run into errors later when asking Claude to perform project operations. So it's best to set this up right from the start to avoid repeated headaches.
Step 3: Install Claude Code via npm
Once your environment is ready, you can officially install Claude Code itself. When installing via npm, note the platform differences:
- Linux/macOS: prepend
sudoto the install command; - Windows: run the command directly, no
sudoneeded.
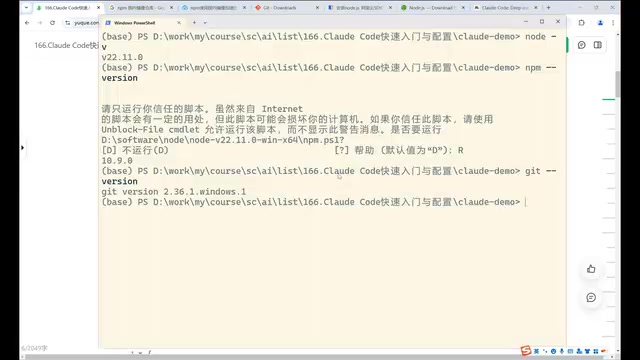
If your network is slow, it's recommended to configure a domestic npm mirror registry, since the default uses overseas mirrors and download speeds may be affected. If you already have a VPN setup, whether or not you configure a mirror makes little difference—this command-line tool is fairly small and downloads quickly.
After installation, run claude --version to check the version number; seeing a version number means the installation succeeded. At this point, you can also enter claude --help to view the full help documentation and command parameter descriptions.
Step 4: Configure a Network Proxy (Essential for Users in China)
This is the pitfall users in China are most likely to hit. Due to network restrictions, running the claude command directly may very well trigger an "unsupported region" error. The solution is to create a configuration file in the project's root directory:
- Create a
.claudefolder in the current project; - Create a
settings.jsonfile inside it; - Write in the proxy addresses for HTTP and HTTPS requests, pointing to your VPN proxy service.
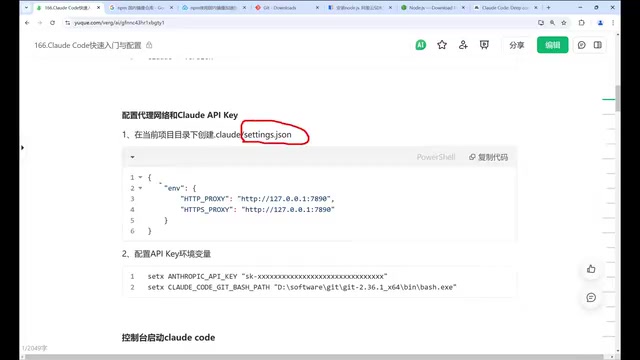
Note in particular that this error is inconsistent—sometimes it's triggered, sometimes not. But once the region restriction is triggered, the errors often persist. If your command-line window doesn't have a global proxy set up, the safest approach is to configure this settings.json in your project in advance. If you've already set up a global proxy on an overseas server or locally, you can skip this step.
Step 5: Configure Your API Key and Account Authorization
With the network configured, you enter the most crucial part—authorization. Claude Code offers two main payment methods:
- Subscription: a fixed monthly fee, suited to heavy users with high call volumes and frequent usage, with fewer restrictions;
- API Key pay-as-you-go: pay only for what you use, suited to light users who don't make many calls.
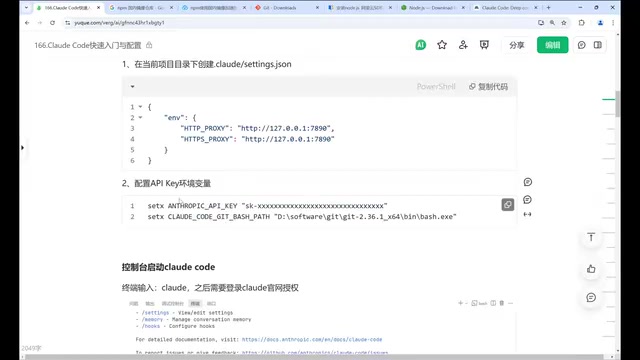
In addition, you can choose a third-party proxy service ("wrapper" service). These services set up their own API Keys and proxy calls to the official interfaces. They may offer better prices, and some even provide credits for free trials. Note that when using a third-party service, in addition to configuring the API Key, you must also configure the API base URL (the third-party service's interface address)—just follow the corresponding provider's documentation. When using the official service, there's no need to configure a base URL.
Login and Authorization Flow
After running the claude command, you'll enter a guided setup flow:
- First, choose a UI theme (light or dark);
- Next, choose a login method; the program will redirect to the Claude official website to complete authorization (provided you've registered an account and completed a payment or subscription);
- Once authorization succeeds, the system automatically retrieves a token and writes it to the local
.claude.jsonconfiguration file.
If you want to use a custom API Key, after configuring the environment variable, the program will ask "Do you want to use the Key from the current environment variable?"—choose "yes" to use your configured Key; the default "no" uses the token automatically retrieved from the official site.
Signs of a Successful Configuration
Once all steps are complete, enter claude in the terminal, and you should see the Welcome to Claude Code welcome screen, with the current workspace directory shown below it. Seeing this screen means the entire environment is configured correctly and the installation and setup phase is successfully complete.
If you still see various option prompts instead of the welcome screen, it means the environment isn't fully configured yet—just follow the on-screen prompts to complete the setup step by step.
Summary
Claude Code may seem to have a low barrier to entry, but there are quite a few traps hidden in the environment configuration—especially the two major challenges facing users in China: network proxies and Git Bash environment variables. The complete configuration process can be summarized as follows:
- Install Node.js (LTS version, 20 or higher);
- Install Git to obtain the Bash terminal;
- Install Claude Code via npm;
- Configure a proxy to resolve region restrictions;
- Configure your API Key and complete login authorization.
Get these five steps right, and you'll have laid a solid foundation for the subsequent core mode switching, CLAUDE.md memory management, and enterprise-level project work. As the saying goes, a craftsman must sharpen his tools before doing his work well—a stable runtime environment is the first cornerstone of mastering Claude Code.
Related articles

Alibaba Launches Happy Shrimp: AI-Powered One-Click Complete Song Generation
Alibaba launches Happy Shrimp, an AI music generation tool that creates complete songs with lyrics, melody, arrangement, and vocals from natural language descriptions. In-depth analysis of its core features, differentiation from competitors like Suno, and industry impact.

GPT Sol Ultra vs Grok 4.6: Real-World Task Completion Benchmark in Reasoning Mode
Developer benchmark reveals GPT Sol Ultra completes draw.io scientific diagrams in one iteration while Grok 4.6 fails to converge despite maximum reasoning mode, exposing that reasoning depth ≠ task delivery capability.
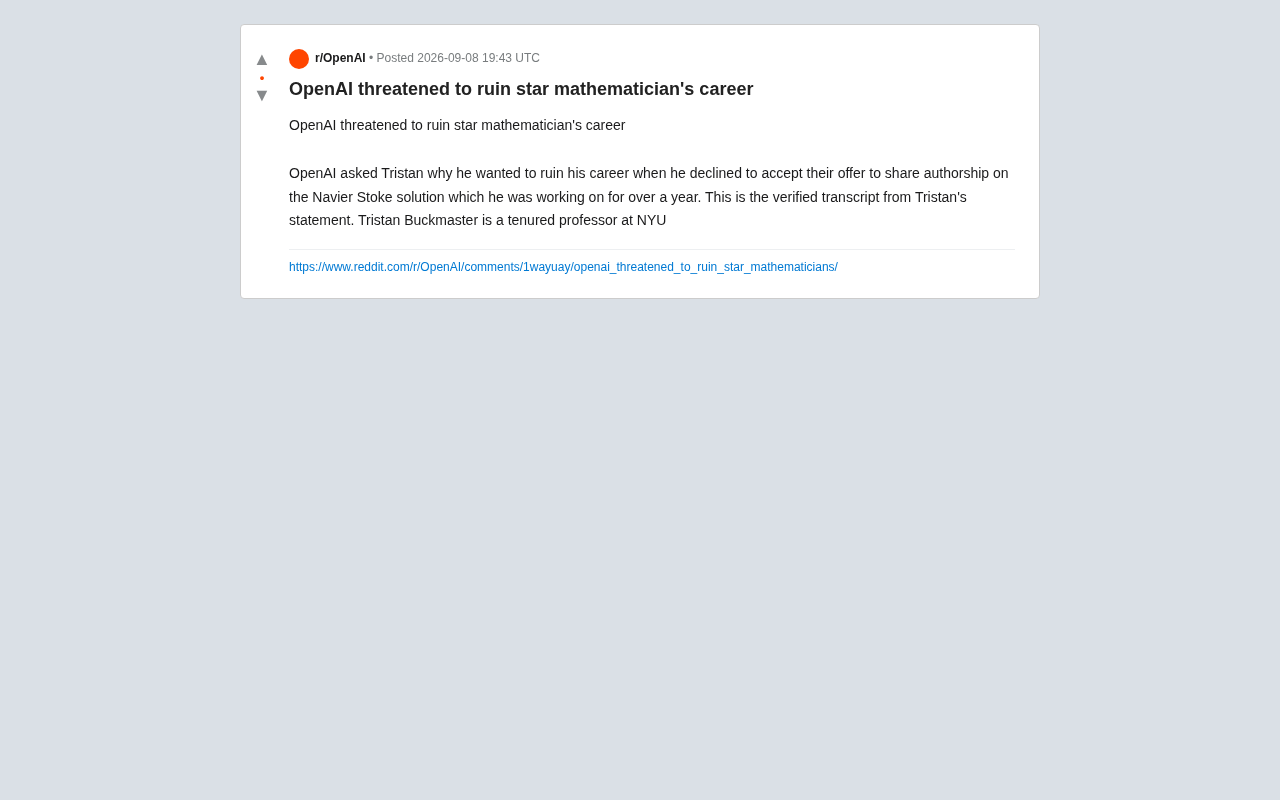
OpenAI Authorship Dispute: The Battle Over Academic Boundaries in the AI Era
OpenAI disputes authorship with mathematician Tristan Buckmaster over Navier-Stokes research, raising ethical questions about AI involvement in science.