LLM App Development in Practice: Setting Up a Multi-Turn Conversation & Streaming App Project from Scratch

Stage 3 walkthrough: set up a full-stack AI assistant project with FastAPI, Vue3, and MySQL.
Based on Bilibili creator "Huacai"'s LLM development course Stage 3, this article documents the shift from one-off scripts to a sustainable engineering project. It covers the full setup process: extracting the source package, configuring MySQL credentials in .env, creating a database with utf8mb4 collation, running SQL scripts to generate 5 tables, setting up a Python virtual environment in PyCharm, installing backend dependencies, launching FastAPI with --reload and --port 8080, starting the Vue3 frontend with npm i and npm run dev, and verifying the role-based permissions system with two test accounts.
This article is based on the Stage 3 tutorial from Bilibili creator "Huacai"'s large language model application development course. It focuses on the critical shift from script-based development to true project engineering. By the end of Stages 1 and 2, learners will have already covered FastAPI, Vue3 full-stack development, LLM API programming fundamentals, and prompt engineering. Starting from this stage, code will officially be written into a real project — with the end goal of building an interactive AI assistant complete with a UI and user management system.
From Scripts to Projects: Why This Is a Critical Turning Point
Throughout the first two stages, developers were writing scripts: open a terminal, run it, get the output, done. This approach works perfectly well for validating logic and rapid prototyping, but it has one fundamental limitation — once it runs, it's gone. No UI, no users, no system.
Starting with the multi-turn conversation and streaming application stage, and continuing through a dozen or more subsequent stages, all code will be integrated into a complete project. This marks a fundamental shift in how learning happens: building the project in practice while simultaneously learning LLM application development. This "project-driven learning" approach turns abstract technical skills into runnable, deliverable products.
The course's continuity by design is worth noting. The preceding foundational stage used over 60 videos and roughly 20 hours to build a full-stack universal permissions system, and Stage 3 continues to expand on top of that system. The course provides two source code packages: the initial code at the start of the video (the download for this lesson) and the finished code after completing the stage, making it easy for learners at different points to sync up.
Downloading the Source Code and Understanding the Project Structure
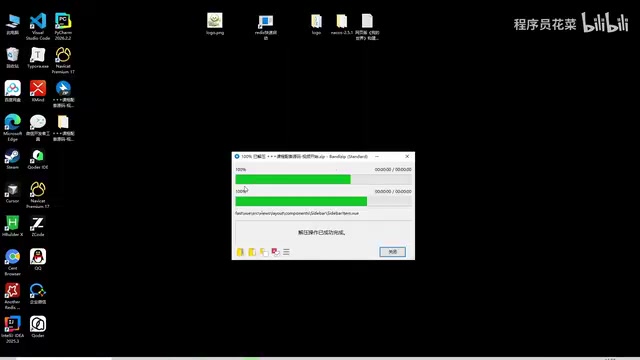
The first step in setting up the environment is to download and extract the course's source code package. After extraction, you'll see a fast directory — drag it out, then delete the original archive and outer folder. The internal structure of the fast directory is clean and contains all assets accumulated during the foundational stage:
- fastapi directory: backend service code
- web directory: frontend Vue3 project
- socal (SQL) script: database initialization script
In other words, the backend, frontend, and database script are all present — forming a complete full-stack project skeleton. Open the fast directory in PyCharm and you're ready to begin configuration. If you still have your code from the foundational stage, you can skip this step entirely.
Database Configuration: Connecting and Initializing
Before starting the project, you must configure the database. The core steps involve the .env file and the MySQL connection.
Updating Environment Variables
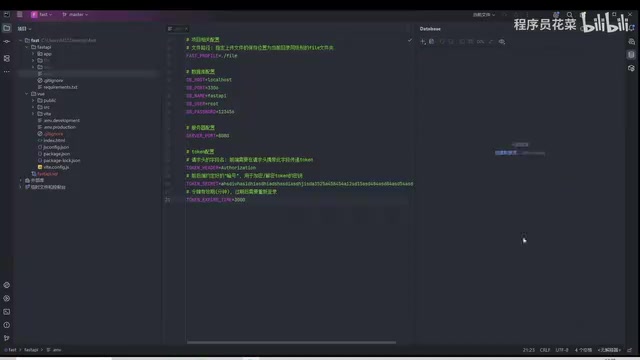
Open the .env file and confirm the database name is fastapi. Make sure to update the password field to match your local MySQL password — this is the most frequently mentioned error point in the tutorial and directly determines whether the connection succeeds.
The
.envfile is the standard practice for managing configuration in the Twelve-Factor App methodology — separating sensitive information like database passwords and API keys from source code by storing them in environment variable files, preventing credentials from being committed to version control systems like Git. In the Python ecosystem, thepython-dotenvlibrary automatically reads the.envfile at application startup and injects the variables into the environment. FastAPI projects typically load and validate these settings through Pydantic'sBaseSettingsclass. Note that the.envfile itself should be added to.gitignore; teams generally only commit a.env.exampleas a configuration template. This is precisely why the course's source code requires learners to manually update the password rather than using it as-is.
Creating the Data Source and Database
In PyCharm's Database panel on the right, click the plus icon to add a MySQL data source, enter your username and password, then test the connection. If you've already watched the "Stage 0" software installation tutorial (which covers PyCharm setup and configuration) and have already created a database, you can reuse it directly.
A key detail when creating the database: create a new Schema named fastapi, and set the collation to the utf8mb4_utf8mb4 family — this corresponds to the recommended character set configuration for MySQL 8 and properly supports Chinese characters and emoji storage.
Running the SQL Script
The newly created database will be empty. Right-click to run the SQL script from the downloaded source package, and make sure to check the execution log for any errors. A successful run should result in 5 tables being created, signaling that the data layer is ready.
Python Interpreter and Dependency Installation
Before starting the backend, you need to configure a virtual environment interpreter and install dependencies. PyCharm provides a fully visual workflow — no need to type commands manually.
Adding a Local Interpreter
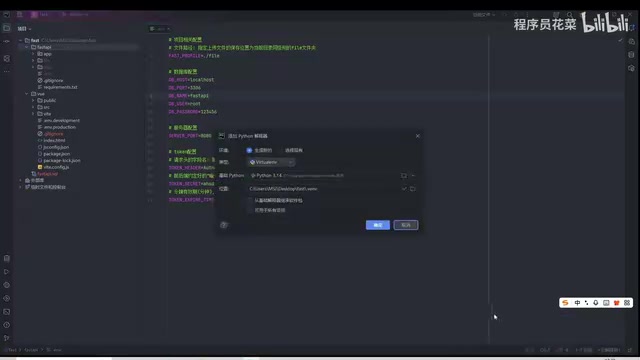
Click the interpreter selector in the bottom-right corner and choose "Add New Interpreter → Add Local Interpreter". Set the type to Python, select your locally installed Python version as the base interpreter. The most critical part is the path: navigate to the fastapi directory inside the fast package, then append /.venv to the path. If this path is entered incorrectly, the virtual environment won't be created properly.
Once configured, a .venv folder will appear under the fastapi directory in the left-side file tree. If it doesn't show up immediately due to slow loading on lower-spec machines, check that it has been created in your file explorer, then reopen PyCharm.
A virtual environment is Python's core mechanism for isolating project dependencies. Each project maintains its own package versions in a standalone
.venvdirectory, preventing dependency conflicts between projects..venvis the officially recommended naming convention for virtual environment directories (PEP 405), created viapython -m venv .venv. PyCharm's visual configuration essentially runs the same command — it just integrates the path input and interpreter binding into the IDE interface. The reason for appending/.venvto the path is to tell PyCharm to create and manage this isolated environment inside thefastapidirectory. All subsequent dependencies will be installed there, leaving the system-level Python environment untouched.
Installing Backend Dependencies
Double-click to open the dependency declaration file. PyCharm will detect it and display a download button. Click it and wait for the progress bar to complete — all required project dependencies will be automatically installed into the virtual environment.
Starting the Frontend and Backend Services
With dependencies in place, you can start both services.
Starting the Backend
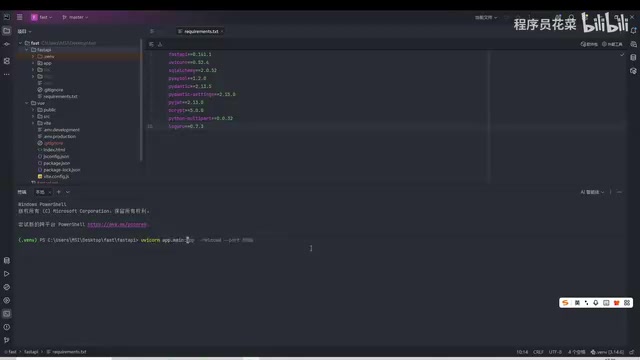
Right-click the fastapi directory and select "Open in Terminal", then enter the startup command. The tutorial specifically flags a common pitfall: certain autocomplete suggestions can lead you to type the wrong parameters. The correct startup command uses the --reload hot-reload flag and --port 8080 port flag, with no extra spaces or characters between -- and the parameter names.
If the terminal shows that the FastAPI permissions system has started successfully, the backend is ready. Hold Ctrl and click the address link in the terminal — your browser should open and display a "Congratulations, backend started successfully" message. Any 404 shown on the page is due to a missing favicon file and can be safely ignored.
Starting the Frontend
Right-click the web (vue) directory and select "Open in Terminal". First run npm i (shorthand for npm install) to fetch the frontend dependencies, then run npm run dev to start the development server. Once the frontend page loads, you can log in to verify everything is working.
npm iis short fornpm install. It reads thepackage.jsonfile in the project root and downloads all declared dependencies into thenode_modulesdirectory — analogous to the backend's dependency installation. The first run takes longer; subsequent runs can be skipped if dependencies haven't changed.npm run devinvokes thedevcommand defined in thescriptsfield ofpackage.json. For a Vue3 + Vite project, this typically starts a local development server with Hot Module Replacement (HMR) enabled, so frontend changes are reflected in the browser instantly without a manual refresh — significantly improving development efficiency.
Login Verification
Log in with the admin account admin / admin123 to see all modules built during the foundational stage displayed in full. Switch to the regular user 张三 / 123456 to access the user-facing home page, verifying that the permissions system correctly distinguishes between different roles.
Wrap-Up: The Foundation Is Set — LLM App Development Begins
At this point, the course preview and environment setup for the multi-turn conversation and streaming application stage are complete: source code extraction, database connection and initialization, Python interpreter configuration, frontend and backend dependency installation and startup, and account permission verification — a complete full-stack project startup workflow has been walked through end to end.
The value of this stage isn't in any new LLM technology itself — it's in consolidating previously scattered script-based capabilities into a sustainable engineering framework. With the foundation in place, the next lesson will officially dive into the core LLM application development content: multi-turn conversations and streaming responses. For developers looking to systematically learn how to ship AI applications, this "establish the project first, then layer in capabilities" approach is well worth adopting.
Related articles

Gaussian Process Bandit Optimization: Exploration Strategies and Inference Regret Guarantees
Cumulative regret guarantees in Bayesian optimization fail to reflect final recommendation quality. This article examines a new study that provides inference regret guarantees for Gaussian process bandit optimization through exploration query strategies and fill distance analysis, validated on hyperparameter optimization and control tasks.
The Most Detailed Codex Guide on Bilibili: From Installation to Real-World Practice
The most detailed Codex guide on Bilibili: from app store installation to daily work mode configuration, with a real coffee shop project demonstrating file organization, data extraction, dashboard creation, and other practical tasks. Learn to use Plan Mode and desktop pets to leverage Codex efficiently.

Appearance Compensation in Volume Rendering: Why RGB Accuracy Cannot Guarantee Density Correctness
Volume rendering research reveals that volumetric data perfectly reproducing external RGB views may still contain density errors: appearance compensation can double central density and keep external rays unchanged even when L2 error exceeds 14.52%. Density recovery depends on appearance capacity, spatial resolution, and measurement design.