Python Webhook Callbacks in Practice: Ditch Polling for Efficient Async Communication

Hands-on Python Flask guide comparing polling vs. Webhook patterns for efficient async communication.
This article provides a hands-on comparison of polling and Webhook async communication patterns using Python Flask. Through a simulated payment provider project, it demonstrates how Webhooks eliminate redundant network requests by letting servers push results via callbacks. It also covers production considerations including security verification, idempotency, tunneling tools, and persistent storage.
Introduction: Why You Should Stop Polling
When building modern web applications, we frequently need to handle asynchronous tasks — payment processing, file conversion, data analysis, and more. Many beginners instinctively keep asking the server: "Is my task done yet?" This approach is called polling, and while it works, it's extremely inefficient.
Polling is one of the most primitive state synchronization mechanisms in distributed systems, dating back to early computer network communications. In the context of HTTP, polling comes in two variants: short polling and long polling. Short polling has the client repeatedly sending requests at fixed intervals, with the server immediately returning the current state. Long polling, on the other hand, has the server hold the request open until new data is available or a timeout occurs. This article primarily discusses short polling. Beyond Webhooks, the modern web has also developed server-push technologies like Server-Sent Events (SSE) and WebSocket, each suited to different scenarios — SSE for unidirectional data streams, WebSocket for bidirectional real-time communication, and Webhooks for cross-system asynchronous event notifications.
A more professional approach is to use Webhooks (callback hooks): let the server proactively notify you when a task is complete, instead of you asking repeatedly. This article walks through a complete Python Flask project, implementing both polling and Webhook patterns from scratch so you can see the difference firsthand.
Core Concepts: Callbacks and Webhooks
What Is a Callback?
A callback is a general programming pattern: you hand someone an "address" or "function" and tell them, "Let me know when you're done." In the web world, that "address" is a URL endpoint, and this specific form of callback is called a Webhook.
The Classic Payment Scenario
Imagine a typical payment flow:
- A user clicks "Subscribe" in your application
- Your server requests a checkout session from a payment provider (e.g., Stripe)
- The payment provider returns a payment form URL
- The user completes the payment on that form
- The key question: How does your server know the user has paid?
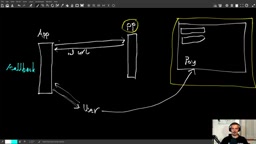
Polling approach: Your server asks the payment provider every few seconds, "Has the user paid?" — potentially asking 200 times before getting a "yes." This wastes enormous network resources and server compute.
Webhook approach: When creating the checkout session, you tell the payment provider: "When it's done, please hit https://myapp.com/callback to notify me." After the user completes payment, the provider proactively sends a POST request to that URL with the payment result. Your server never needs to ask even once.
Building the Webhook Server with Flask (Simulating a Payment Provider)
We'll use Flask to build a "division calculation service" that simulates async task processing. It accepts two numbers, performs division in the background (with an artificial 5–15 second delay to simulate a time-consuming operation), and notifies the caller via Webhook when complete.
Core Processing Function
import uuid, time, random, threading, requests
from flask import Flask, request, jsonify

app = Flask(__name__)
tasks = {}

def process(task_id, number1, number2, callback_url):
    time.sleep(random.randint(5, 15))  # Simulate time-consuming computation
    try:
        result = number1 / number2
        tasks[task_id] = {"status": "success", "result": result}
    except ZeroDivisionError:
        tasks[task_id] = {"status": "fail", "result": None}

    time.sleep(2)  # Simulate additional processing overhead

    if callback_url:
        try:
            requests.post(callback_url, json={
                "task_id": task_id,
                **tasks[task_id]
            })
        except requests.RequestException:
            pass
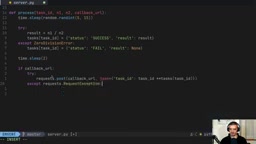
The key here is the final requests.post(callback_url, ...) — after the task completes, the server proactively POSTs the result to the URL provided by the caller. This is the core mechanism of a Webhook.
It's worth noting that the example uses Python's standard library threading.Thread for background tasks, which is fine for demos and small-scale applications but has significant limitations in production. Python's Global Interpreter Lock (GIL) restricts multi-threading parallelism for CPU-intensive tasks. Additionally, task state stored in process memory is lost if the application restarts or crashes. In production, you'd typically use a dedicated task queue system like Celery with Redis or RabbitMQ as the message broker. Celery supports task persistence, failure retries, result backend storage, task priorities, and scheduled execution — making it the de facto standard for async task processing in the Python ecosystem.
API Endpoint Design
The server exposes two endpoints:
- POST
/task: Creates an async task, accepts two numbers and an optional callback_url, and immediately returns a task_id (HTTP 202 Accepted) - GET
/task/<task_id>: Queries task status (for polling mode), with an artificial 2-second delay to simulate query overhead
The HTTP 202 Accepted status code used here is an important semantic identifier defined in the HTTP/1.1 specification. It indicates that the server has accepted the request but has not yet completed processing. Unlike 200 OK, 202 explicitly conveys "request received, but the result isn't ready yet." This is standard practice in RESTful API design for handling async operations: after a client submits a long-running task, the server shouldn't keep the connection hanging until completion. Instead, it immediately returns 202 with a task identifier, letting the client retrieve results later via polling or Webhook. This pattern is widely adopted in APIs from AWS, Google Cloud, and other cloud services, and is a foundational convention for building scalable async architectures.
@app.route("/task", methods=["POST"])
def create_task():
    data = request.get_json()
    task_id = str(uuid.uuid4())
    tasks[task_id] = {"status": "processing", "result": None}
    threading.Thread(target=process, args=(
        task_id, data["number1"], data["number2"],
        data.get("callback_url")
    )).start()
    return jsonify({"task_id": task_id, **tasks[task_id]}), 202
Client Implementation: Polling vs. Webhook Side by Side
The Performance Pain Points of Polling
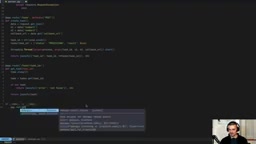
In polling mode, the client iterates through all task IDs on every page load, querying the server for each one:
@app.route("/")
def index():
    for t_id in task_ids:
        statuses[t_id] = requests.get(f"{API}/task/{t_id}").json()
    # Render page...
The actual experience is terrible: every page refresh takes 2 seconds × number of tasks. With 5 tasks, just loading the page takes 10 seconds. Worse, before tasks complete, you have to keep manually refreshing to see results.

The Elegant Webhook Implementation
Switching to Webhook mode requires just two changes:
Step 1: Include a callback_url when submitting tasks
@app.route("/submit", methods=["POST"])
def submit():
    callback_url = f"{SELF}/callback"
    response = requests.post(f"{API}/task", json={
        "number1": n1, "number2": n2,
        "callback_url": callback_url
    })
    # ...
Step 2: Create a callback endpoint to receive results
@app.route("/callback", methods=["POST"])
def callback():
    data = request.get_json()
    statuses[data["task_id"]] = data
    return "", 204
The experience after this refactor is dramatically different:
- After submitting a task, the page refreshes instantly with no waiting
- You can continue submitting more tasks without being blocked
- The server automatically pushes results to your callback endpoint when computation finishes
- The next time you refresh the page, results are already available locally — zero wait time
Polling vs. Webhook Performance Comparison
| Dimension | Polling | Webhook (Callback) |
|---|---|---|
| Network requests | Many redundant requests | Only one callback |
| Perceived latency | Depends on polling frequency | Real-time notification |
| Server load | High (handling many queries) | Low (notify on demand) |
| Implementation complexity | Simple | Slightly more complex (requires a public endpoint) |
| Best suited for | Simple prototypes, internal tools | Production environments, third-party integrations |
Webhook Production Deployment Considerations
During local development, both Flask applications run on localhost and can access each other without issues. But in production, there are several critical points to keep in mind:
1. The Callback URL Must Be Publicly Accessible
If you're using third-party services like Stripe, your callback endpoint can't be localhost or a private IP — it must be a public domain or IP address.
Debugging Webhooks in a local development environment faces a natural obstacle: localhost isn't publicly reachable, so third-party services can't send callback requests to your development machine. To solve this, the community has developed several tunneling tools. ngrok is the most popular choice — it creates a temporary public URL (e.g., https://abc123.ngrok.io) and forwards traffic to a local port, while providing a request inspection dashboard for debugging. Cloudflare Tunnel (formerly Argo Tunnel) offers similar functionality with deep integration into the Cloudflare ecosystem. Platforms like Stripe also provide dedicated CLI tools (stripe listen --forward-to localhost:5000/callback) that can receive and forward Webhook events locally with support for event replay, greatly simplifying the development and debugging workflow.
2. Security Verification
In production, you should verify the source of callback requests to prevent forged callbacks.
Webhook security is the most easily overlooked yet most critical aspect of production deployment. Since Webhook endpoints are publicly accessible URLs, anyone can send forged POST requests to them. Common security verification approaches include: HMAC signature verification — the service provider (e.g., Stripe, GitHub) signs the request body using a shared secret with HMAC-SHA256 and places the signature in an HTTP header (e.g., Stripe's Stripe-Signature header); the receiver recalculates the signature with the same secret and compares them. Timestamp verification — the signature includes a timestamp, and the receiver rejects requests outside a certain time window (typically 5 minutes) to prevent replay attacks. IP whitelisting — restricting acceptance to requests from the service provider's known IP ranges. Stripe also provides a webhook.construct_event() method in its official SDK to simplify this verification process.
3. Idempotency
The same callback may be sent multiple times (due to network retries), so your processing logic should be idempotent.
Idempotency means that executing the same operation once or multiple times produces exactly the same effect. In the Webhook context, due to network unreliability, the service provider may resend a callback request if it doesn't receive your 200 response in time. If your processing logic isn't idempotent — for example, crediting a user's account every time you receive a payment success callback — then duplicate callbacks would result in duplicate credits. Common strategies for implementing idempotency include: using a unique event ID (e.g., Stripe's event.id) as a deduplication key, recording processed event IDs in the database, and checking for existence before processing; using database transactions and unique constraints to prevent duplicate writes; designing state updates as "set to a value" rather than "increment by a value." Idempotency is not just a requirement for Webhook handling — it's one of the core principles of all distributed system design.
4. Persistent Storage
The example uses an in-memory dictionary to store state, but production environments should use a database. In real deployments, web applications typically run multiple processes or instances to handle concurrent requests, and in-memory data can't be shared across processes. Redis can serve as fast shared state storage, suitable for temporary task status. Final business data (such as order status and payment records) should be persisted to relational databases like PostgreSQL or MySQL to ensure data durability and consistency.
Conclusion
At its core, a Webhook is simply the callback pattern at the HTTP level — you give the other party a URL, and they proactively notify you when an event occurs. This "don't call me, I'll call you" design philosophy is the foundation of building efficient async systems. Whether it's payment callbacks, CI/CD notifications, or third-party API integrations, Webhooks are an indispensable pattern in modern web development. Mastering them is an important step in the journey from beginner to professional developer.
Key Takeaways
Related articles

7 Vibe Coding Agents Tested & Ranked: Which AI Coding Tool Should Beginners Choose?
Hands-on comparison of 7 Vibe Coding agents including Trae, Cursor, Claude Code, Codex, WorkBuddy & CoderWork, ranked by beginner-friendliness and performance.

AI-Generated Series 'Nido de Villanas': How AI Tells a Soap Opera Story
Deep analysis of AI-generated telenovela Nido de Villanas Episode 2: examining dialogue design, narrative tension, and AI's potential in dramatic storytelling.

7 Vibe Coding Agents Tested & Ranked: Which AI Coding Tool Should Beginners Choose?
Side-by-side review of 7 Vibe Coding agents including Trae, Cursor, Claude Code, Codex, WorkBuddy, and CoderWork, ranked by beginner-friendliness, performance, and ease of use.