Will Claude Code Delete Your Entire Codebase? The Permission System, Fully Explained
Claude Code permissions explained in three layers: mode controls approval, rules govern tools, sandbox sets boundaries.
Bilibili creator "Mashang Huasheng" breaks Claude Code's permission system into three independent layers: mode (how actions get approved), rules (allow/ask/deny for specific tools), and sandbox (file and network boundaries). Five modes range from manual to skip-permissions, with auto-accept edits covering file deletions and skip-permissions reserved strictly for containers or VMs. Rules follow a deny-first priority — a broad deny can't be rescued by a specific allow. Key warnings: chat instructions aren't permission config; approval doesn't mean unrestricted access; and verification means reviewing diffs, not just dismissing popups.
Letting AI directly operate on your own project makes a lot of people nervous — will this "coworker" end up tearing the house down while trying to help? In Episode 5 of his Claude Code whiteboard series, Bilibili creator "Mashang Huasheng" breaks the permission system down into three layers: who approves actions, what can be done, and where the AI can actually reach. Understanding all three layers is what lets you know why it can do something — and why it gets blocked.
Three Layers of Permissions: Mode, Rules, and Sandbox
Permissions aren't a single toggle — they're three independent but composable components: mode governs how actions get approved, rules specify whether individual tool calls are allowed, require confirmation, or are denied, and the sandbox restricts which files and network resources a command can actually touch. Each layer handles a distinct concern, and they work in combination.
A common trap: telling Claude in the chat "don't make random changes" only influences its behavioral tendencies — it doesn't actually configure any permissions. To truly restrict tool access, you need to go into the permission settings and configure them directly. In other words, verbal instructions and permission configuration are two completely different things — don't conflate them.
Five Permission Modes, Each With Its Own Use Case
The mode determines how every action gets approved. Claude Code offers several meaningfully different modes.
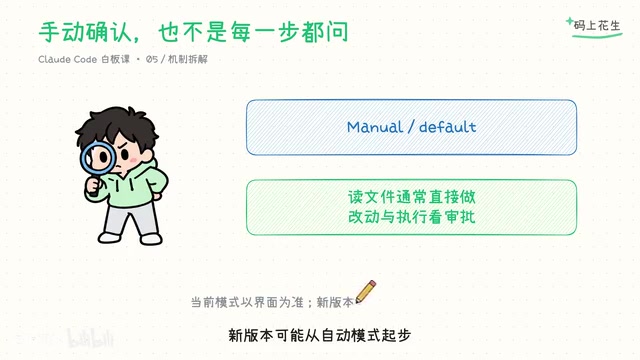
Manual mode is best suited for unfamiliar projects and sensitive tasks. Reading files in the working directory and built-in read-only commands typically run without interruption, while file modifications and other commands follow rule-based confirmation prompts. Worth noting: even though the config labels it "default," that doesn't mean every new session starts there — newer versions may start in auto mode, so always check the interface before deciding how much access to grant.
Auto-accept edits mode is appropriate for local iteration when you're willing to review diffs afterward. It allows certain file operations within scope — and that includes deleting files, not just appending a few lines of code. This is one of the core sources of the "delete everything" concern.
Plan mode is designed for the exploration and proposal phase. In regular sessions, edits to actual files are blocked — but this block has exceptions (such as interactive terminals or when skip-permissions is enabled), so don't treat plan mode as a hard isolation guarantee.
Auto mode is for reducing everyday approval popups. A separate classifier reviews commands, network access, and other actions that warrant scrutiny, then decides whether to allow or block them. It doesn't stamp every read operation, and it doesn't guarantee zero risk. Availability also depends on your model and organization configuration. For significant changes, you still need to review diffs and run validation.
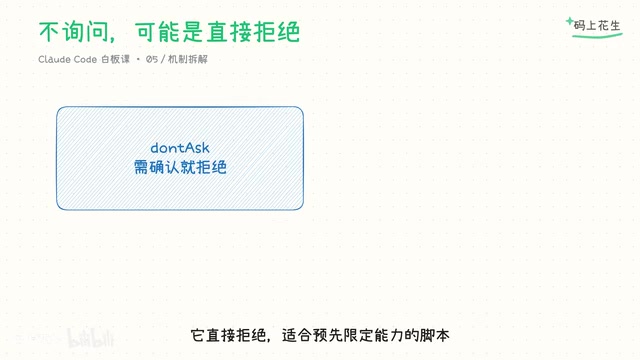
No-prompts mode is the most misunderstood: reads that never required approval still go through, already-authorized tools still run — but if any action would normally trigger a popup, it gets rejected outright. This mode is suited for scripted scenarios where capabilities are defined in advance.
The real "broad access" option is Skip Permissions mode. The official documentation explicitly limits its use to isolated environments — containers, virtual machines — where host systems cannot be harmed. Don't use it to solve "popup fatigue" in everyday projects. That's essentially dismantling your security perimeter.
Skip Permissions and No-Prompts Mode are easy to confuse by name, so it's worth clarifying. No-prompts mode works on the principle of "if an action would trigger a popup, reject it" — it's a conservative hard constraint on Claude. Skip Permissions, by contrast, means "bypass all approval checks entirely" — the two are diametrically opposed. Skip Permissions is typically enabled via a command-line flag (such as --dangerously-skip-permissions), and official documentation explicitly requires it to be used only in environments fully isolated from the host — like Docker containers or virtual machines — because once approvals are bypassed, Claude can execute arbitrary shell commands, including irreversible operations like deleting files or modifying system configuration. Automated tasks in CI/CD pipelines are the canonical use case, since pipelines run in ephemeral containers where errors don't contaminate the host environment.
Rule Matching: Deny Takes Priority, and a Broad Deny Can't Be Rescued by a Specific Allow
Beyond modes, you can write rules for specific tools. The system evaluates in this order: deny first, then ask, then allow. This ordering leads to a critical conclusion — once a deny rule is matched, nothing downstream can override it.
This means a broad deny rule cannot be carved out by a more specific allow rule. Before adding any rule, verify there's no overlap. Don't assume that more specific rules automatically win. Open the permissions panel in the interface to view your rules and their sources.
When practicing, start with two commands you fully understand and write rules using exact matching. Confirm which settings file your rules are saved to. Taking the lazy route of "allow the entire command" carries real risk: it may also permit arguments you didn't intend to allow. Also keep in mind: some commands are already exempt from approval. The absence of a popup doesn't mean your new rule actually took effect.
Rules come from multiple configuration levels, and understanding this helps debug "why isn't my rule working?" Claude Code rules can be written in global config files (typically under ~/.claude/), project-level config files (.claude/ or CLAUDE.md in the project root), and session-level temporary instructions. Rules from different sources are merged together, but the priority order and override logic aren't always intuitive. When you open the permissions panel, each rule shows a "source" label — that's the fastest way to diagnose conflicts. If an allow rule looks correctly configured but isn't taking effect, the most likely cause is that a broader deny rule from a higher or global config level matched first — and once a deny matches, it can't be overridden by any subsequent rule.
How to Verify: Use an "Ask" Rule as Your Test
There's a simple, reliable way to verify that a rule is working. In a practice copy of your project, switch to manual mode, temporarily add an "ask" rule for the same command, then ask Claude to check the repository status. The expected result is a confirmation popup — because ask takes priority over allow. Cross-reference the tool call against the rule, and you'll know whether the configuration actually took effect.
Testing three practice rules is enough. Don't perform destructive actions just to verify behavior. The goal of verification is to match "expected" with "actual" — not to manufacture real risk.
Sandbox: Constrains Commands, But Isn't a Universal Isolation Layer
The built-in sandbox is disabled by default. It primarily constrains commands and the subprocesses those commands spawn. When enabled, commands are still subject to file and network boundaries — approval to execute does not mean access to everything.
But be clear about the sandbox's limits: file tools, external tool services, and hooks are not all covered by the sandbox, and the sandbox itself can be granted permissions to reach outside its boundary. When you see a prompt, understand its scope first. If you need to isolate an entire process, you need an outer environment — containers, virtual machines — to provide that guarantee.
Claude Code's built-in sandbox is implemented on macOS using Apple's sandbox mechanism, and on Linux using seccomp or similar kernel-level restrictions. It constrains shell commands executed by Claude via the Bash tool and their subprocesses — specifically, file system access paths and network connection targets. However, the sandbox does not cover Claude's direct file read/write tools (such as the built-in Read, Write, Edit tools). Those tools operate through a separate permission channel governed by modes and rules, not the sandbox. This is why the article emphasizes that for full process isolation, you need an outer environment — running Claude Code inside a Docker container provides genuine, complete isolation for high-risk tasks. The built-in sandbox alone is not sufficient.
Three Daily Habits and One Core Reminder
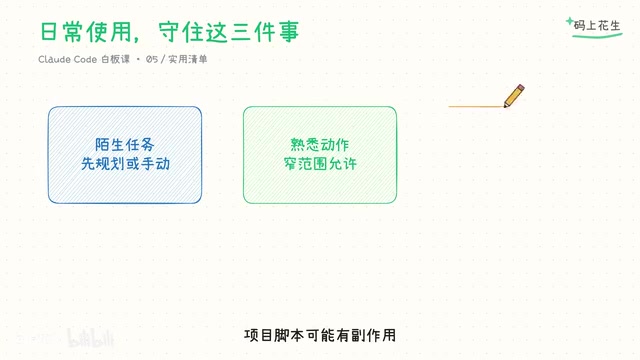
Boiling this complex system down to daily practice, it comes to three things: use plan or manual mode first for unfamiliar tasks; only grant narrowly scoped allows for actions you know well; and always inspect file diffs and verify results when you're done.
The same goes for test commands — check what they actually run. Project scripts may have side effects. You're approving a specific action, not issuing a blanket pass for anything containing the word "test." That's worth remembering.
One sentence to summarize the whole system: mode selects the oversight level, rules define the actions, sandbox sets the boundaries. Configure all three correctly and you'll truly understand why something is allowed — and why something is blocked. Permission confirmation only answers "is this step allowed to proceed." Whether the code is correct, whether the task is complete — that's still on you and your validation process. Understanding permissions doesn't mean your job is done once you've dismissed the popups.
Hands-On Practice Checklist
To genuinely internalize this, prepare a copy of your own project (not connected to production resources), then:
- Confirm which permission mode you're currently in;
- Open the permissions panel and do a side-by-side "allow vs. ask" exercise;
- Inspect rule sources, confirm prompts and repository status;
- Clean up your practice settings and match expected behavior against actual behavior, one item at a time.
The next episode covers project memory files and automatic context retention — how to stop re-explaining your setup every session, and which things belong in a file versus in permission settings.
Related articles

CSS Anchor Positioning: A New UI Positioning Approach Without JavaScript
A deep dive into CSS Anchor Positioning: from anchor-name and position-anchor to the anchor() function, position-area shorthand, position-try-fallbacks, anchor-size, and upcoming anchor queries.

New AI Chart Interaction: Continuous Follow-up Questions and Visualization in Conversation
Explore a new AI interaction method for continuously generating charts in conversation. Use the /visualize command to ask follow-up questions and visualize answers in the same chat window, improving data analysis efficiency.

Cursor Merges Into X Subscription: Paid Plans Share Unified Usage Pool, Grok Model Coding Usage Doubled
Cursor joins The X Subscription with a unified usage pool and doubled Grok coding quota. Third-party models shift to API pricing. Existing users can keep or migrate plans.