WorkBuddy Beginner's Guide: A Complete Walkthrough for AI Office Automation

Learn WorkBuddy vs. Codex differences and run your first AI office automation task in four steps.
This article, based on a hands-on Bilibili tutorial, clarifies the core difference between WorkBuddy and Codex: WorkBuddy is an AI orchestration workbench for daily office tasks, integrating models like DeepSeek and Kimi; Codex is OpenAI's code-specialized Agent. It covers WorkBuddy's interface, the four-element instruction method (goal, input, output format, constraints), workspace and security sandbox setup, and how to review artifacts and changes — all in four simple steps designed to help beginners deploy real office automation.
Everyone's talking about WorkBuddy and Codex, and many people conflate the two — assuming they're basically the same tool that can write copy, organize information, and even handle some development work. But if you only focus on where they overlap, you'll never grasp what truly sets them apart. This article is based on a detailed hands-on tutorial shared by a Bilibili creator. It clarifies what WorkBuddy is actually built for, then walks you through your first real AI office automation task from start to finish.
WorkBuddy vs. Codex: Who Does What
The short answer: WorkBuddy is more like an AI office colleague who's already on the job, while Codex is more like an AI programmer who builds tools alongside you. The former excels at getting your current work done; the latter excels at turning repetitive work into a reusable system.
That's not to say WorkBuddy can't do development or Codex can't write reports — there's real overlap — but they're each optimized for different kinds of problems.
WorkBuddy isn't a proprietary large model. Think of it as an AI orchestration workbench. It can switch freely between third-party Chinese models like DeepSeek, Kimi, and MiniMax, and comes packed with a wide range of built-in Skills. Its core job is task decomposition, local computer control, file read/write, and office software integration — routing instructions to different models for execution. WorkBuddy itself is purely the orchestration layer; all compute and inference depend on the external models it connects to.
Codex, by contrast, is OpenAI's code-specialized model built on deep fine-tuning of the GPT-5 series, combined with a software engineering Agent. Its training data consists primarily of large-scale open-source code, engineering documentation, and debug logs. Its optimization target is narrow: write code, read repositories, fix bugs, and handle backend engineering.
AI Agents are a concept that's risen to prominence in recent years. They refer to AI systems that can autonomously plan steps, invoke tools, and continue executing until a goal is reached — distinct from ordinary chat models that only respond to single-turn questions. Both WorkBuddy and Codex are Agents, but their "toolboxes" are completely different: WorkBuddy's tools are the file system, office applications, and desktop operations; Codex's tools are code execution environments, Git repositories, and terminal commands. This explains why, even though both can "write things," their applicable scenarios are worlds apart — the tools define the boundaries of what an Agent can reach.
Getting to Know the WorkBuddy Interface
When you open the software, the interface splits into two sections: a sidebar on the left and the main workspace on the right. The large input box in the center is the core — just write what you want it to do in a single message. The placeholder text reads "What can I help you with today?" and supports @ to reference files in the conversation, and / to invoke skills and commands.
In the bottom-right corner, you can select a model. The multiplier shown after each model name represents the credit cost ratio — the lower the number, the more affordable. Models like H3 are currently free for a limited time and are perfectly capable for everyday tasks. For complex work, choose a more powerful model like Kimi-K2 with a higher multiplier. If you're unsure, leave it on Auto and let WorkBuddy dispatch automatically.
Above the input box, there are three modes: Daily Office Work, Code Development, and Design & Creative. Whichever you select changes the scenario shortcuts displayed below. The Daily Office Work row includes document processing, financial services, data analysis & visualization, deep research, video generation, presentation editing, and product management. This tutorial focuses primarily on Daily Office Work.
The plus icon in the bottom-left of the input box lets you add files, and also lets you manually specify a mode, expert, skill, or connector. The Experts section includes roles like Content Creation Expert, WeChat Mini Program Developer, and International Contract Legal Expert, with more available to summon.
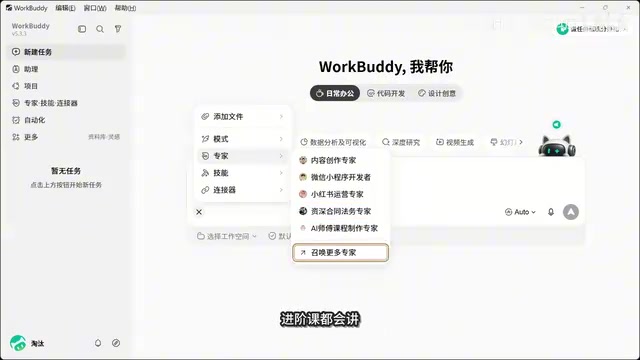
The left sidebar, from top to bottom, contains: New Task, Assistant (remotely controlling your computer from your phone), Projects (for team collaboration), the management center for Experts/Skills/Connectors, Automation configuration (for scheduled recurring tasks), and a "More" section housing the Knowledge Base and Inspiration. Inspiration is a gallery of ready-made templates — find something you like and recreate it in one click. Below that is a large task list where every task you've run is stored.
Worth noting: WorkBuddy is a purely graphical interface application with no command-line interface. All operations happen within this window — which is part of why it's more beginner-friendly than Codex.
The Four-Element Method: Writing Clear Instructions
A lot of people don't know how to write good instructions. The tutorial lays out four elements:
- Goal: What do you want it to produce?
- Input: What materials are you providing?
- Output format: Word, Excel, or something else?
- Constraints: Tone, word count, and other requirements
Cover all four elements clearly, and you'll usually get the right result on the first try. Here's a real example: type in the input box — "Help me organize customer-feedback.txt into an Excel spreadsheet, categorized by issue type and severity, with a summary row at the bottom." This single sentence contains all four elements: goal, input, output format, and constraints.
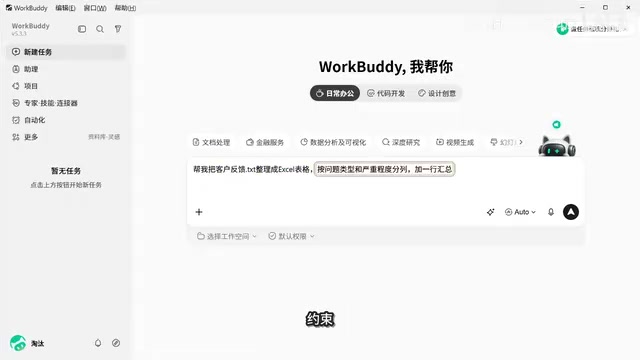
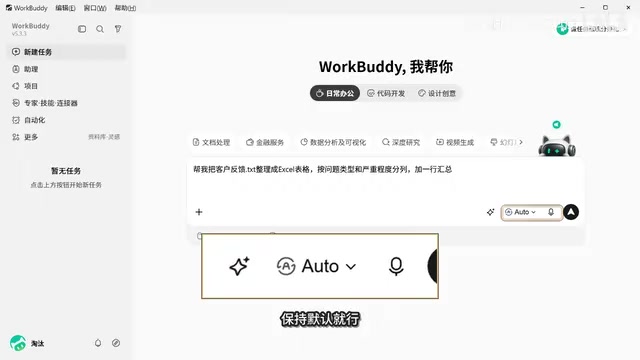
Before sending, notice the small icons to the right of the input box: the star icon is "Enhance Prompt" — if your instruction is rough, it'll polish and complete it for you. The "auto" in the middle handles model dispatch and is fine left on default. The microphone icon next to it supports voice input — speak instead of type.
Configuring a Task: Workspace and Security Permissions
After writing your instruction, you need to configure the task. First, click "Select Workspace" to tell WorkBuddy which folder to work in. Creating a new workspace automatically creates a folder with the same name on your local machine (by default inside a WorkBuddy directory under your user folder on the C drive). It's recommended to use one workspace per task category — clean and safe.
The easiest way to provide materials is to drop your files directly into the workspace folder; WorkBuddy will find them automatically. You can also click the plus icon to add local files or Tencent Docs.
For execution mode, the default setting reads "Can efficiently execute and complete tasks" — meaning it dives straight into the work. There are two toggles below: enabling "Q&A" makes it answer questions without touching any files; enabling "Plan" makes it present a proposal first, then act only after you confirm. Beginners should keep the default; for complex tasks, enabling Plan is recommended.
WorkBuddy's security sandbox provides three layers of protection: commands are first run inside the sandbox and flagged before anything reaches your system; deletions go to the recycle bin rather than being permanently removed; and existing files are automatically backed up before any modifications. The "Allow Full Access" toggle, once enabled, bypasses all prompts and executes everything directly — beginners should leave this at the default and not touch it.
A security sandbox is a standard safety mechanism in Agent-type software. Because AI autonomously generates and executes code or system commands, the sandbox's role is to simulate execution in an isolated environment before any command actually touches the operating system, intercepting potentially dangerous operations. WorkBuddy's three-layer protection — sandbox interception, recycle bin routing, and automatic backup — essentially creates a buffer zone between "autonomous execution" and "user control." This kind of design is especially important in Agent products aimed at non-technical users, who often can't anticipate whether every AI action is safe.
Collecting Results: Artifacts, Previews, and Change Comparisons
Once you hit send, the task begins executing and the interface switches to the task detail view. Its workflow is clearly visible: it first deeply thinks through the customer feedback file and works out a classification logic, then loads the spreadsheet skill, writes a script, and gets to work — each step is listed on screen. The whole process takes a minute or two.
The right-side panel is where you collect your results. The dropdown at the top defaults to "Overview," with options to switch to other views. Below that, the Artifacts section holds all files generated by this task. The finished Excel file opens automatically — columns properly set up, color-coded, and with the summary row in place.
Switching to "Workspace Files" view shows every file in the folder, with your original materials and finished outputs clearly visible. The "Changes" view records every modification made to existing files, with before-and-after comparisons. For web-related tasks, the "Browser" view lets you preview the result directly.
Making revisions is just as easy: type a follow-up message like "Change the severity column to three tiers: High, Medium, Low," and WorkBuddy will edit the existing spreadsheet rather than starting from scratch. Every change is listed clearly. The file is updated in place, and even if you close the window, nothing is lost — the task stays in the left-side task list, ready to be reopened at any time.
Wrapping Up
Completing a WorkBuddy task takes just four steps: Write the instruction (using the four elements: goal, input, output format, constraints), Configure the task (select a workspace, choose an execution mode, leave permissions at default), Watch the execution (the process is transparent and trackable), and Collect the results (artifacts, previews, change comparisons, and file retrieval in the right-side panel).
This workflow lowers the barrier to entry for AI Agents, making it possible for complete beginners to actually put daily office automation into practice. The full course covers 10 sessions on WorkBuddy and 14 on Codex. This article covers the first session — interface orientation and your first task — but installing Skills is what truly unlocks WorkBuddy's potential to work on your behalf.
Related articles

AI Daily Briefing: Qwen3-Omni Full-Modality Model Launches, Huawei Ascend 960 and Grok's New Model Surface
AI Daily: Qwen3-Omni Flash launches with full-modality support and 93% cost cuts; Huawei unveils million-processor AI architecture; Ascend 960 rumored; Grok spotted on GCP; N8N hits CVSS 10 vulnerability.
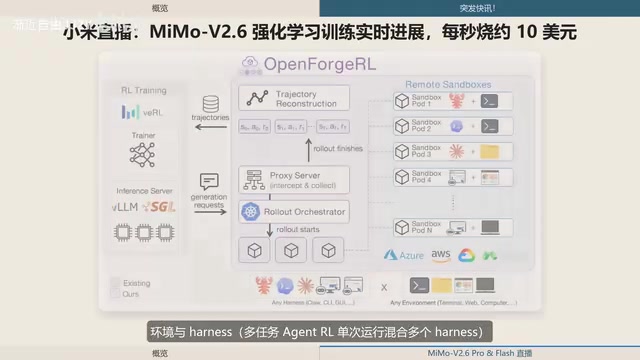
Xiaomi MiMo-V2.6 Live Training: ¥8.55M Spent in One and a Half Days, ~$10 per Second
Xiaomi's MiMo team live-streams MiMo V2.6 Pro/Flash RL training, spending ¥8.55M (~$1.28M) in 1.5 days — ~$10/sec. Covers compute scaling, open-source plans, and DeepSWE benchmarks.
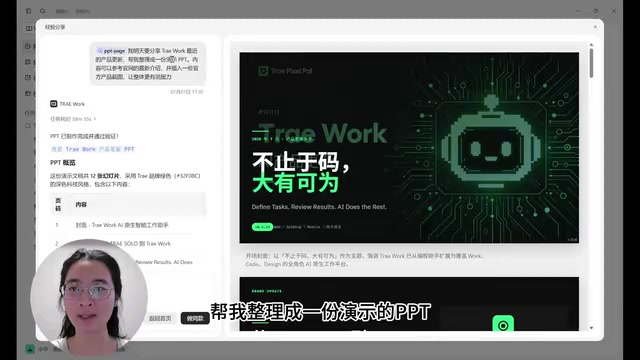
ByteDance Trae Work Getting Started Guide: 11 Use Cases Explained
A hands-on guide to ByteDance's Trae Work AI agent — covering Work, Code, and Design sections across 11 use cases including PPT generation, data analysis, coding, and more.