Getting Started with Claude Code: Installation, Configuration, and Three Working Modes Explained
A beginner's guide to installing, configuring, and mastering Claude Code's three working modes.
A hands-on guide to Claude Code: what makes it an AI Agent rather than a chat tool, how to install Git, Node.js, and Claude Code on Windows, how to fix environment variable and network issues, connect to free domestic models via Alibaba Cloud Bailian, and use its default, auto, and plan modes.
What Exactly Is Claude Code?
Claude Code has been gaining significant traction in the developer community lately. At its core, it's an AI programming assistant, but it differs fundamentally from the web-based AI chat tools we're familiar with—like ChatGPT, DeepSeekAd, or Doubao. It doesn't just chat; it can actually roll up its sleeves and get work done directly on your computer.
From a technical standpoint, Claude Code falls into the category of AI Agents rather than traditional conversational AI. The defining characteristic of an Agent is its closed-loop capability of "perceive—decide—execute": it can perceive the external environment (reading the file system and code structure), perform multi-step reasoning and decision-making, and invoke tools to carry out real actions. Anthropic has implemented a tool-calling framework within Claude Code that allows the model to directly operate Shell commands, file I/O, and process management, elevating it from an "advisor" to an "executor."
You simply describe your requirements in natural language, and it can understand the project structure, automatically search for files, create and modify code, and run commands directly. This ability to "take action" is precisely what sets Claude Code apart from traditional AI chat tools.
Five Dimensions to Understand the Core Differences
Below are five dimensions that intuitively illustrate the differences between Claude Code and ordinary web-based AI:
- Interaction method: Ordinary AI requires you to repeatedly copy and paste between the chat box and your editor—a cumbersome process; Claude Code operates directly within your project, eliminating the friction of switching back and forth.
- Context understanding: Ordinary AI only knows what you tell it; Claude Code can automatically read your entire project's code and search for relevant files on its own.
- Execution capability: Ordinary AI can only offer suggestions or code snippets and struggles with multi-file projects; Claude Code can directly create files, modify code, run commands, and execute tests.
- Memory: Ordinary AI forgets everything the moment you close the window; Claude Code can persistently remember project rules and your coding preferences through configuration files.
- Tool invocation: Ordinary AI struggles to call external tools; Claude Code can directly connect to browsers, databases, GitHub, and other external services through the MCP protocol.
Background on the MCP Protocol: MCP (Model Context Protocol) is a standardized protocol open-sourced by Anthropic in late 2024, designed to solve the fragmentation problem of integrating AI models with external tools. MCP is akin to a "USB interface standard" for the AI field, defining a unified communication format that allows any external service conforming to the protocol to plug into Claude Code seamlessly. Currently, the MCP ecosystem encompasses hundreds of server implementations covering scenarios like file systems, web search, databases, and code execution, making it a critical piece of infrastructure for extending Claude Code's capabilities.
A vivid analogy: chatting with ordinary AI is like calling a remote consultant for advice, whereas Claude Code is like having an assistant sitting right beside you who can browse through folders and modify code on their own.
Should You Switch Over from Cursor?
Regarding the question of "whether to switch from Cursor to Claude Code," the pragmatic advice is: use whichever tool you're more comfortable with. That said, many frontend developers have recently leaned toward Claude Code, largely because it's more token-efficient and generates results that better match real-world needs.
Token Consumption and Cost Efficiency: Tokens are the basic units that large language models use to process text—roughly 1.5 Chinese characters correspond to 1 token, and about 4 English characters correspond to 1 token, directly determining API call costs. The reason Claude Code is more token-efficient than Cursor lies in its more precise context management strategy: through static analysis, it prioritizes loading files relevant to the current task rather than injecting the entire project's code into the context, cutting the token consumption of a single task by several times.
Installing Claude Code: Three Steps
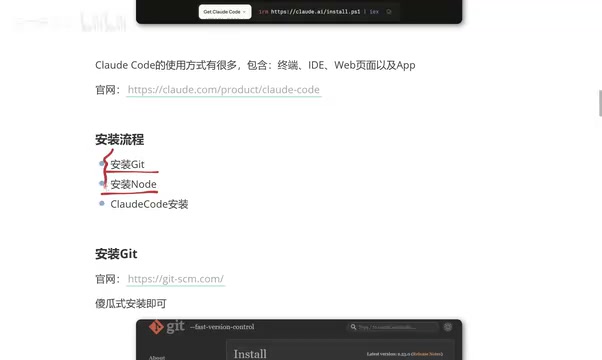
Claude Code supports multiple usage methods, including the terminal, IDE integration, web, and app. For most developers, the terminal method is the most concise and efficient, and it's the approach this article focuses on.
Step One: Install Git and Node.js
Before installation, you need to prepare two foundational tools: Git and Node.js. Both provide user-friendly installers—just download the Windows version from the official website and click Next all the way through.
Node.js is a JavaScript runtime built on Chrome's V8 engine. Claude Code is distributed as an npm package (npm is Node.js's package manager) and is itself a command-line tool written in JavaScript/TypeScript. The benefit of distributing through the npm ecosystem is excellent cross-platform compatibility—Windows, macOS, and Linux users can all install it with the same command. For the Node.js version, it's recommended to choose the LTS (Long-Term Support) version to avoid compatibility issues caused by runtime version differences.
After installation, verify via the command line:
- Type
git—if there's no error, the installation succeeded; - Type
node -v—if a version number is output, the installation succeeded.
As for the installation path, unless your C drive is critically low on space, keep the default path—both Git and Node.js are small in size.
Step Two: Install Claude Code
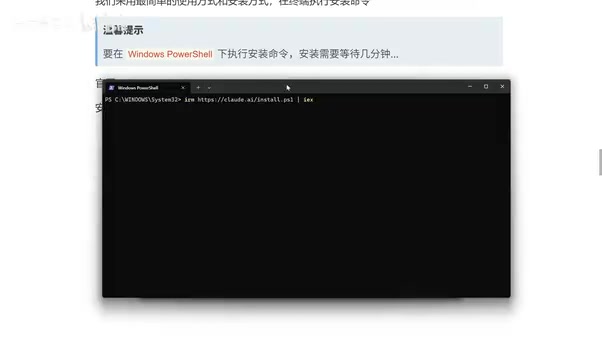
Once the prerequisite tools are installed, open Windows PowerShell (no administrator privileges needed), copy the installation command from the Claude Code official website, and paste it to execute. Wait a few minutes, and when the terminal outputs the version number, the installation is complete.
After installation, remember the path where the executable is located—it's usually in the C:\Users\YourUsername\.local\bin directory.
Configuring Claude Code: Solving Three Major Issues
Completing the installation doesn't mean you can use it immediately—you still need to resolve the following three key configuration issues in sequence.
Issue One: Configuring Environment Variables
Some users encounter a "not recognized as an internal or external command" error when running the claude command in the terminal. This happens because the installation path hasn't been added to the system's environment variables.
Environment variables are a key-value storage mechanism at the operating system level, providing shared configuration that all running processes can read. Among them, the PATH variable is especially critical—when the operating system executes a command, it searches for the corresponding executable in the directories listed in PATH one by one; if the installation directory isn't in PATH, the system can't find claude.exe and throws an error. For sensitive configurations like API keys, passing them through environment variables rather than hardcoding them into source code is also a standard industry security practice that prevents keys from leaking along with the code.
Solution: Type "environment variables" into the Windows search box, open "Edit the system environment variables," find Path under User variables and double-click it, click "New," add the bin directory path mentioned earlier, and save. After closing and reopening PowerShell, running claude will be properly recognized.
Issue Two: Bypassing Network Verification
After configuring environment variables, running Claude Code may trigger a "failed to connect to Claude" authorization error—a common issue in China's network environment.
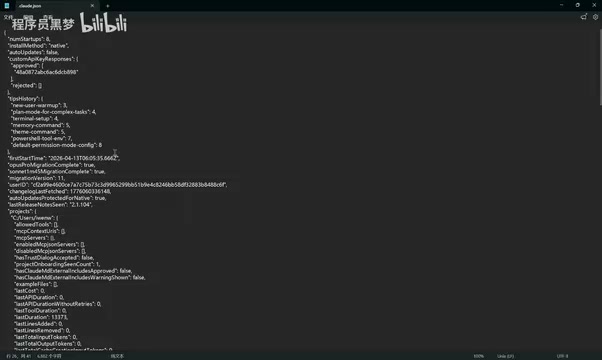
Solution: In the C:\Users\YourUsername directory, find the .claude.json configuration file, open it with an editor, add the configuration items to bypass verification (note: use English commas as separators), save, and restart.
Issue Three: Connecting to a Domestic Large Model
If you don't have a paid Claude subscription, you won't be able to use its native models. We recommend connecting to Alibaba Cloud Bailian (Alibaba Cloud Model Studio) platform, whose free tier fully meets everyday development needs.
Alibaba Cloud Bailian provides an interface compatible with the OpenAI API format, which is key to understanding "why Claude Code can seamlessly connect to domestic models." When OpenAI released its GPT API, it defined a set of HTTP interface specifications, which later became the de facto industry standard for large model APIs. Major domestic large model platforms (Alibaba Cloud Bailian, ByteDance Volcano Engine, Zhipu AI, etc.) all provide interfaces compatible with this format, meaning that simply by replacing the Base URL and API Key, Claude Code can call domestic models like Qwen and GLM without modifying any underlying code.
The switching process has three steps:
- Create an API Key: Log in to the Alibaba Cloud Bailian official website, find API Key in the left navigation, click to create and name it.
- Set environment variables: Configure three items via the command line in sequence—the API Key value, Alibaba Cloud Bailian's public base API address, and the target model name (you can choose a free model like Qwen).
- Verify the configuration: Use commands to check whether the Key, URL, and model name match your settings; once confirmed, the configuration is complete.
After completing these three steps, Claude Code is ready to use.
Hands-On Experience: The Three Working Modes of Claude Code
Once configuration is complete, let's take "creating a promotional webpage" as an example to demonstrate Claude Code's complete workflow.
It's recommended to first create a dedicated working directory for your project—for example, run mkdir claude-code-demo on the F drive, then enter the directory and run the claude command to launch.

After launching, trust the current folder, and you can describe your requirements in natural language. When the requirement information is incomplete, Claude Code will proactively ask for details (such as feature specifications, design style, etc.) and only begin generating once everything is clear, avoiding rework.
The actual results were quite impressive—a complete page with animations and a sleek, tech-forward feel was generated in a short time. If a frontend developer were to implement the same effect by hand, it might take an entire day, whereas Claude Code dramatically compressed this time cost, leaving only minor tweaks to the logo and copy afterward.
The Three Working Modes Explained
During file operations, Claude Code will request authorization and offer the following options:
- Single authorization (yes): Each time a file is created or modified, confirmation is required—the safest option;
- Authorize for this session: No further prompts during the current conversation, balancing efficiency and safety;
- Reject (no): Don't perform the file operation and continue the discussion to confirm.
By pressing Shift + Tab, you can switch between Claude Code's three core working modes:
- Default mode: User confirmation is required before every file modification—suitable for scenarios sensitive to code changes;
- Auto mode: After a one-time authorization, everything executes automatically—the most efficient, suitable for batch operations on well-defined tasks;
- Plan mode: Only discusses, doesn't modify files—suitable for handling complex business logic.
The Engineering Value of Plan Mode: The design philosophy behind Plan mode comes from the software engineering best practice of "requirement clarification before coding." In traditional development workflows, ambiguous requirements are the leading cause of rework. Plan mode restricts the AI to a "read-only thinking" state, forcing requirement alignment to be completed before entering the execution phase. During the planning stage, the AI proactively identifies boundary conditions, potential conflicts, and technical dependencies—essentially a low-cost "design review." For high-risk operations involving database schema changes, API interface design, and the like, planning before execution can significantly reduce the cost of errors.
First use multiple rounds of dialogue to let the AI fully understand the requirements and boundaries, then switch modes to execute operations—this is the most recommended approach when handling complex projects.
Conclusion
The installation and configuration of Claude Code has a few key pitfalls for beginners, but as long as you handle them step by step in the order of "configuring environment variables → bypassing network verification → connecting to a domestic model," you can use it smoothly without a paid subscription.
The true value of Claude Code lies in two things: deep understanding of the entire project context and the ability to take action directly in your local environment. Combined with the three flexible working modes—default, auto, and plan—it can significantly boost development efficiency, making it an AI programming assistant every developer should seriously get to grips with.
Key Takeaways
Related articles

What Is Vibe Coding? The AI Programming Skill Every Developer Needs
What is Vibe Coding? Learn how AI programming is reshaping dev teams, why traditional programmers face displacement, and why Cursor & Claude Code matter.
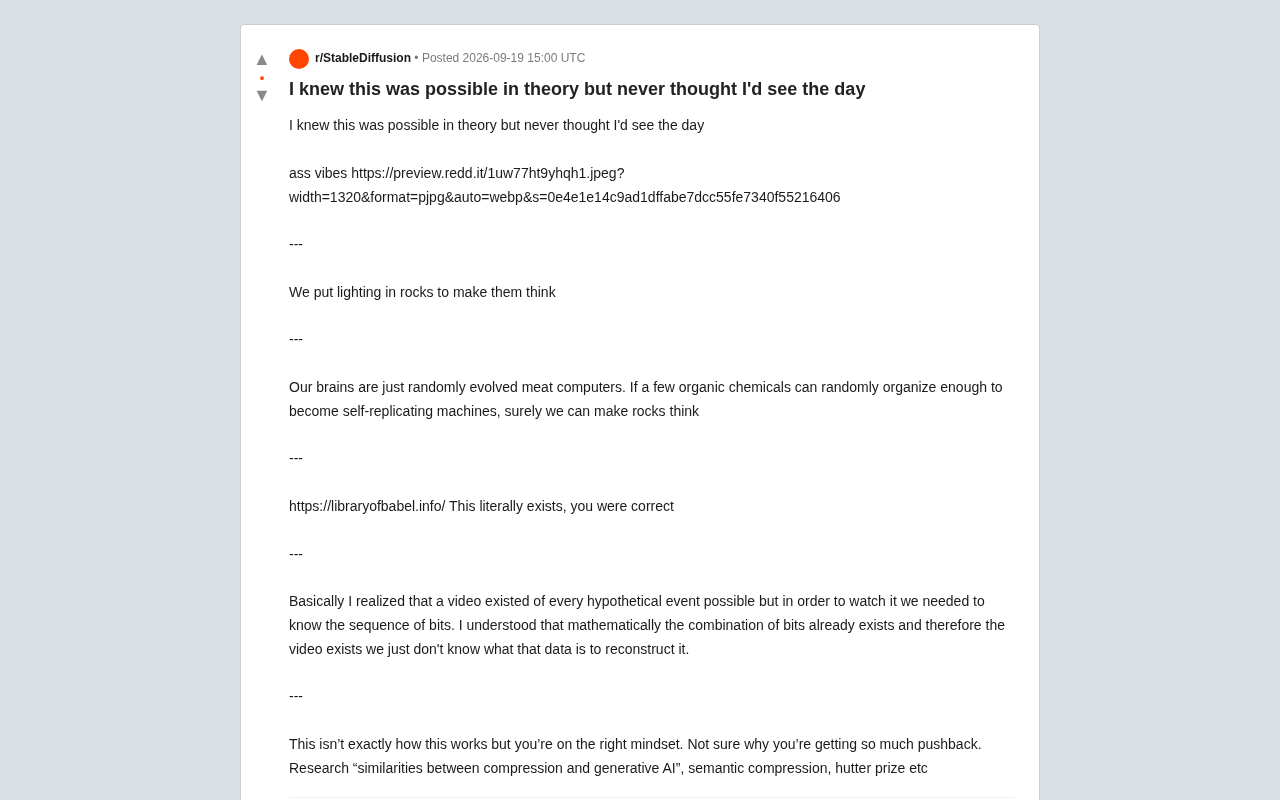
Making Rocks Think: A Philosophical Exploration of Generative AI and Information Compression
From a viral Reddit post to deep AI theory: why compression equals understanding, the Library of Babel thought experiment, semantic compression, and the Hutter Prize.
Irregular Warns: Four AI Lab Security Breaches Traced to the Same Root Cause
Irregular reveals four AI lab security breaches share a single root cause, exposing systemic risks from technology stack homogeneity across the AI industry.