Getting Started with PiDeck: A Complete Guide to the Local AI Coding Workbench

A complete getting-started guide to PiDeck, the free open-source local AI coding workbench.
PiDeck is a free, open-source desktop workbench that wraps AI coding CLIs like Claude Code and Cursor in a unified graphical layer. This guide walks through installation, environment detection, model and authentication setup, project management, and advanced conversation techniques to build an efficient AI coding workflow.
If you're already using Claude Code, Cursor, or other AI coding CLI tools to write code, you've surely run into these pain points: switching projects, managing sessions, and reviewing history all rely on command-line operations, the AI conversations in each terminal window are isolated from each other, and once you close a window, last week's solution is gone for good. The "PiDeck Getting Started Series" tutorial by Bilibili creator Cao Ayu systematically introduces how the open-source desktop workbench PiDeck solves these problems. This article distills its six episodes into a complete getting-started guide.
Before diving in, it's worth understanding the ecosystem context these tools operate in. Over the past two years, command-line AI coding assistants have risen rapidly. Claude Code, launched by Anthropic, lets developers drive large models with natural language directly in the terminal to write, debug, and refactor code; Cursor and Windsurf represent another path, deeply integrating AI into VS Code-like graphical editors. What these tools share is elevating the large language model (LLM) from a "Q&A box" to an Agent capable of reading project files, executing commands, and modifying code. However, while CLI tools are lightweight and scriptable, they inherently lack session persistence and multi-project management capabilities—each terminal window is an independent process, and historical conversations are hard to search. PiDeck emerged against this backdrop as a gap-filling product. It doesn't reinvent the wheel; instead, it wraps existing CLIs in a unified graphical management layer.
What Is PiDeck: Putting a Graphical Shell on the CLI
PiDeck is essentially a desktop workbench designed to manage your AI Agent sessions. In the most straightforward terms, it wraps an Electron shell around command-line tools, but users don't need to worry at all about what's happening under the hood—they only need to remember one core concept: PiDeck equals a unified place to manage the AI conversations across all your projects.
Electron deserves a bit more explanation here. It's the technical foundation for mainstream desktop software like VS Code, Slack, and Discord. Its core idea is to render the interface with Chromium and handle system-level logic with Node.js, enabling developers to build cross-platform desktop applications using web technologies (HTML/CSS/JavaScript). This explains why PiDeck depends heavily on the Node.js environment, and why it can offer three installer formats simultaneously: Windows EXE, Mac DMG, and Linux AppImage. For PiDeck, the Electron shell handles rendering the graphical interface—project lists, conversation areas, file trees, and so on—while the actual interaction with the large model is still handled by the underlying wrapped CLI process.
Its interface layout is very clear—the project list is on the left, the conversation area in the middle, and the file tree and session history on the right. The most crucial design is that projects are completely isolated: the context of Project A won't pollute Project B, you can freely switch between multiple projects, and the AI in each project remembers where you left off last time.
Its core mental model is also simple: one Agent Tab equals one CLI process. On top of retaining the full capabilities of the raw command line, PiDeck additionally provides a multi-project workspace, session visualization, Git integration, a built-in terminal, a graphical configuration editor, and a built-in curated Chinese prompt library (reportedly containing over 4,000 prompts that can be imported with one click).
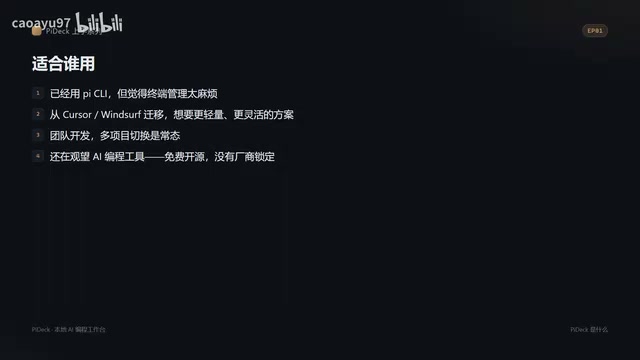
Who Is PiDeck For
According to the tutorial's summary, PiDeck is mainly aimed at four types of users: first, developers who already use CLIs but find terminal management too cumbersome; second, people who came from Cursor or Windsurf and want a more lightweight, flexible solution; third, team development scenarios where switching between multiple projects is the norm; and fourth, newcomers still on the fence about AI coding tools. The reason it's suitable as a starting point is that it's free, open-source, and has no vendor lock-in.
Installing PiDeck and Environment Detection: Order Matters
Installing PiDeck has one easily overlooked yet critical principle—get the underlying CLI working first, then add projects and start the Agent. The correct installation sequence has three steps:
- Install Node.js version 20 or higher (get it from the Chinese download page at nodejs.org);
- Install the corresponding AI command-line tool;
- Then install and open PiDeck, and complete environment detection.
The installers can be downloaded from GitHub Releases: EXE for Windows, DMG for Mac, and AppImage for Linux. Before installing, it's recommended to run node --version and the corresponding CLI version command in the terminal to confirm the underlying setup is ready.
Details of Environment Detection
When you first open PiDeck, it automatically performs environment detection—this is the most critical step. The program searches for CLI executables in the system paths and common paths, and if it can't detect them, it provides installation guidance. For users of NVM, PNPM, or similar version management tools, you often need to manually specify the path to the executable. The reason problems tend to arise here is that tools like NVM (Node Version Manager) install Node.js and its global packages in hidden paths within the user directory, rather than the system default directory, causing PiDeck's automatic scan to miss them—this is also a common pitfall for many cross-language developers when configuring terminal tools.
Under "Settings → Developer Settings," you can customize paths, set detection flags, and trigger re-detection. After filling in the path, click "Verify and Use"—seeing the green CLI status means the configuration succeeded. Before finishing this episode, be sure to confirm all four things are complete: Node.js installed, CLI installed, PiDeck opened, and environment detection passed.
Configuring Models and Authentication: Don't Confuse the Two Methods
Getting the environment working isn't enough—you also need to tell PiDeck which model to use and how to fill in the API Key. The tutorial specifically emphasizes configuring the model before opening a project—because once the Agent starts, it needs to be able to chat immediately, and if the model isn't configured, even an open project can't send valid requests.
PiDeck offers two configuration methods—don't confuse them:
- Models (Model Page): Suitable for custom providers, relay services, or OpenAI-compatible interfaces. You need to fill in the Base URL, API type, and API Key, then fetch or manually add the model list.
- Auth (Authentication Page): For providers with official direct connections, such as DeepSeek. In most cases you only need to fill in the API Key, without assembling the Base URL yourself.
Behind this distinction are two typical forms of the current AI model access ecosystem. The "OpenAI-compatible interface" has become the de facto standard—services including DeepSeek, Tongyi, and numerous open-source model deployment tools mostly provide Base URLs and calling formats conforming to the OpenAI API specification, so clients only need to switch the URL and Key to connect to different models. The so-called "relay service" is a proxy layer built by third parties on top of official APIs, typically used for unified billing, bypassing regional restrictions, or aggregating multiple models. Understanding this makes it clear why official vendors go through Auth (direct connection, no URL assembly needed), while relays and custom providers go through Models (requiring manual Base URL entry)—the two correspond to two different network paths: direct connection and proxy.
Just remember the division of labor: official vendors preferably go through Auth, while relays or custom interfaces go through Models. When configuring on the Models page, you can first click "Configuration Guide," and after filling in the information, be sure to click "Save" for it to take effect.
It's worth mentioning that after saving the configuration, the entry point for switching models is at the bottom of the conversation input box (not the top). Click the model name to switch the model and thinking level. This is the spot newcomers are most likely to look for in the wrong place.
Adding a Project and Your First Conversation
Once both the environment and model are ready, you can add a local project. Click the plus sign at the top of the left panel, select a local project directory, and the project will appear in the left list.
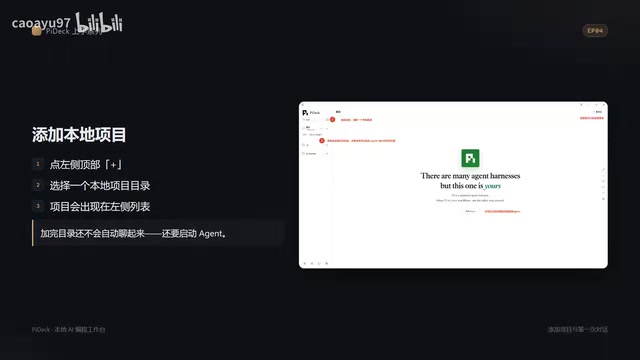
Note that adding a directory won't automatically start a conversation—you still need to manually start the Agent. There are several ways to start it: you can click the plus sign on the project row in the sidebar, click the "Start Agent" button on the blank page in the middle, or start/restart in the new session area in the top right. Only after it starts successfully and enters the conversation interface can you select a model and send messages.
Stringing the first four episodes together, the complete basic loop is: install Node → install CLI → install PiDeck → environment detection → configure Models/Auth and save → add project → start Agent → select model at the bottom → send message. Confirm that there's a local project on the left, the Agent is started, the model can be switched at the bottom, and you can receive replies—then the basic loop is complete.
Advanced Conversation: Making Your Questions More Efficient
Sending messages is just the starting point. Episode five covers a more solid way of asking questions, with the core principle being start from a specific problem—don't just say "help me look at the code," but clearly state the goal, files, and constraints, such as "see what's wrong with a certain file" or "add a dark mode toggle to the login page."
Several practical features are worth mastering:
- File reference: Type
@in the input box to select project files, and the file content will be added directly to the context—no copy-pasting needed. - Slash commands: Typing
/pops up a list of available commands. The commonly usedcompactcompresses the context to free up tokens, and there are session-related commands to explore on your own. - Shell commands: Type
!followed by a command (e.g.,!git status) to execute it in the current project directory, with the output returned to the conversation area—handy for quickly checking status, viewing diffs, and running tests.
The "Context" that appears here is a key concept for understanding AI coding tools. Each time the large model generates a reply, it takes the previous conversation and referenced file content as input, and this total input is limited by the "context window," measured in Tokens (roughly equal to 0.75 English words, or fewer Chinese characters). As the conversation grows longer and more files are referenced, Tokens gradually approach the limit, causing the model to "forget" earlier information or respond more slowly. This is precisely the point of the slash command compact—it compresses lengthy history into a summary to free up Token space. Similarly, the tutorial's advice to "start a new session when the task changes topic" is essentially about avoiding irrelevant context occupying precious window capacity and interfering with the model's judgment.
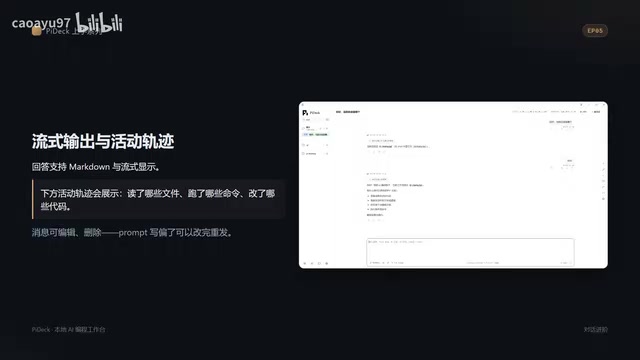
Replies support Markdown and streaming display, and the activity trail below shows which files the AI read, which commands it ran, and which code it changed. The recommended workflow is: confirm the model and thinking level at the bottom → @ the relevant files and make a specific request → look at the activity trail and modification results → use !git diff to verify changes → start a new session when the task changes topic to avoid context pollution.
Advanced PiDeck Features: Unleashing Its Full Potential
If you only use the conversation feature, the tutorial estimates you're using only about 30% of PiDeck's capabilities. The final episode quickly runs through several advanced features:
- Multi-project workspace: You can add multiple local projects on the left and switch between them at any time, with each project's context unaffected by the others.
- Git version management: You can view branches, changes, and commit records on the right.
- Built-in terminal: At the bottom you can choose PowerShell, cmd, Git Bash, etc., which—along with the
!commands in the conversation—execute in the current project directory. - Session history: This is one of the most intuitive improvements over the command line—you can browse history by project, restore context with one click, and export records for archiving.
- Prompt store: Built-in curated Chinese prompts, supporting category search and one-click import.
Summary
Compared with the raw CLI, PiDeck retains all native capabilities and adds multi-project graphical management, session history visualization, Git and terminal panels, and a graphical configuration editor. For developers who switch between multiple projects every day and are tormented by terminal session management, it's an efficiency tool worth trying. Combined with its free, open-source, and vendor-lock-in-free nature, it also makes a solid starting point for newcomers getting into AI coding workflows. Interested readers can visit its GitHub project page to learn more.
Key Takeaways
Related articles
Understanding GitHub's Availability Report: Platform Stability and Developer Response Strategies
Deep dive into GitHub's monthly availability report: analyzing service degradation impacts, CI/CD fault tolerance, and platform dependency risk strategies for resilient development.

OpenAI's Claim of Solving a Millennium Prize Problem Sparks Academic Controversy
OpenAI claims its AI solved a Millennium Prize Problem, sparking debates over attribution, verification, and AI's role in reshaping mathematical research.
Ledoit-Wolf Covariance Shrinkage in Practice: 57% Lower Turnover + 10x GPU Acceleration
Learn how Ledoit-Wolf covariance shrinkage reduces portfolio turnover by up to 57% and how cuML GPU acceleration cuts backtest time from 1.5 hours to 9 minutes.