MiniMax Open-Source Video Model Local Deployment: Runs on 8GB VRAM with Impressive Speed
MiniMax's open-source accelerated video model runs on 8GB VRAM locally via ComfyUI — fast, free, and accessible.
MiniMax's latest open-source AI video generation model can be deployed locally through ComfyUI. Thanks to int quantization and on-demand VRAM loading, the 21GB main model runs on as little as 8GB of VRAM, with an official low-VRAM edition available. Deployment involves placing the main model and VAE decoder in the correct paths, installing the latest ComfyUI, and choosing from 5 non-API workflows covering standard text-to-video, motion effects, image-to-video, and identity-consistent generation. Testing on a 24GB GPU showed near-instant 10-second video output with strong character consistency. The combination of open-source, low VRAM requirements, and fast speeds significantly lowers the hardware and cost barrier for local AI video creation.
Open-source AI video generation has a new heavyweight contender worth your attention. According to hands-on testing by Bilibili creator 零度解说, MiniMax's latest open-source accelerated model can run locally in ComfyUI — not only is it blazing fast, but its VRAM requirements are surprisingly friendly. Even GPUs with around 8GB of VRAM can handle it. Both text-to-video and image-to-video workflows produce solid quality output. For local AI enthusiasts who've long been locked out by high VRAM requirements, this is genuinely great news.
Why a 21GB Model Can Run on an 8GB GPU
A lot of people see the main model's 21GB file size and immediately assume they need 21GB+ of VRAM. That's not the case.
As explained in the video, ComfyUI performs on-demand loading and offloading of the main model between VRAM and system RAM. Combined with int quantization, the weights are never fully loaded into the GPU at once. In other words, 21GB is the file size on disk — not the peak VRAM usage during inference.
More importantly, the model authors also provide a low-VRAM version specifically designed for users with 8GB to 12GB of VRAM. This tiered design means users across different hardware configurations can find an option that works for them, which is a big reason this open-source release has gotten so much attention.
Int quantization (integer quantization) is one of the core technologies that makes large models run on consumer hardware. Raw AI model weights are typically stored as 32-bit or 16-bit floating-point numbers. Quantization compresses these values into 8-bit or even 4-bit integer representations. This compression can reduce the memory/VRAM footprint to 1/4 to 1/2 of the original, and inference speed also improves since integer operations are more efficient than floating-point ones. The trade-off is a slight loss in precision, but for video generation tasks, this is typically imperceptible to the human eye. Combined with ComfyUI's chunked loading mechanism — which loads only the weights needed for a given layer into GPU VRAM and releases them afterward — models far exceeding available VRAM can actually run on consumer graphics cards.
Complete Local Deployment Walkthrough
The entire deployment process revolves around ComfyUI. The steps are straightforward but require some patience.
Downloading the Main Model and Dependencies
The first step is downloading the main model file (approximately 21GB). The creator recommends using a multi-threaded download manager called TDM Fast to speed things up. Once downloaded, you'll need to install or upgrade to the latest version of ComfyUI — the video emphasizes that only the latest version supports this accelerated model. If you already have it installed, a fresh install over the existing one and syncing your previous configuration should work fine.
Where to Put the Model Files
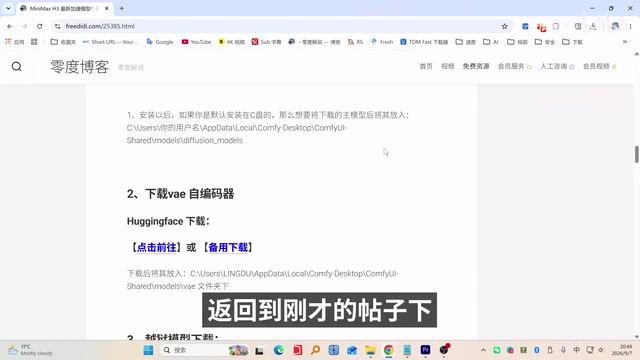
File placement is where beginners most often go wrong. Using the default installation path, the main model goes into AppData\Local\ComfyUI\...\models\diffusion_models under your user directory. You'll need to enable "Show hidden items" in Folder Options to see the AppData directory.
In addition to the main model, you'll also need to separately download the VAE decoder and place it in the VAE folder under the models directory. Don't skip this step — the workflow will throw a missing file error without it.
How to Choose Among the Five Workflows
The accelerated model's workflows are divided into three categories: NVIDIA GPUs, AMD GPUs, and low-VRAM. Download the version that matches your hardware. Users with 8–12GB VRAM should pick the low-VRAM version, AMD users grab the AMD version, and NVIDIA users use the standard version.
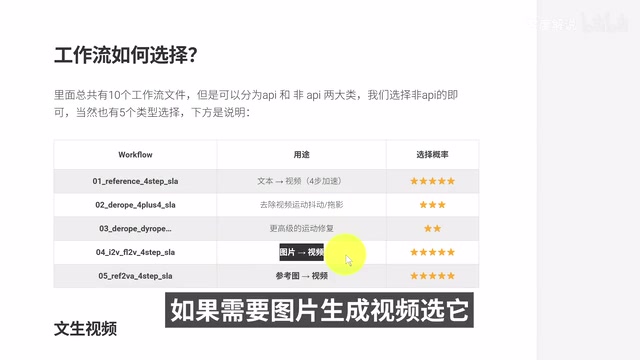
Once downloaded, you'll find 10 workflow files inside. The ones labeled "API" are for cloud-based calls — for local deployment, you want the 5 files without "API" in the name. Here's what each one does:
- First: Standard 4-step generation workflow — works for most users
- Second: Generates videos with fast motion or motion blur effects
- Third: An improved version of the second, further refined for high-speed motion footage
- Fourth: Image-to-video or first/last frame video — choose this when generating video from images
- Fifth: Reference image video generation, focused on maintaining character or identity consistency
For the vast majority of users, the first standard workflow is all you need.
Installing Nodes and Importing Workflows
Once ComfyUI is open, use the extension manager to search for and install the required custom nodes. Then create a blank workflow and drag your downloaded workflow file into it. If the top bar shows a missing model file warning, just download whatever it's asking for and you're good to go.
VAE (Variational Autoencoder) serves as the "translator" in the video generation pipeline. The diffusion model performs its noise prediction and denoising operations in a compressed latent space — the final output is a set of abstract numerical tensors, not pixels that your eyes can see. The VAE decoder's job is to convert those latent space representations back into actual RGB video frames. Without the VAE, the workflow can only produce intermediate data with no visual output. This is why even with the main model in place, a missing VAE file will still cause the entire pipeline to fail. Different models typically require their own matching VAE weights, so you can't simply substitute another model's VAE file.
Real-World Results: Speed Meets Quality
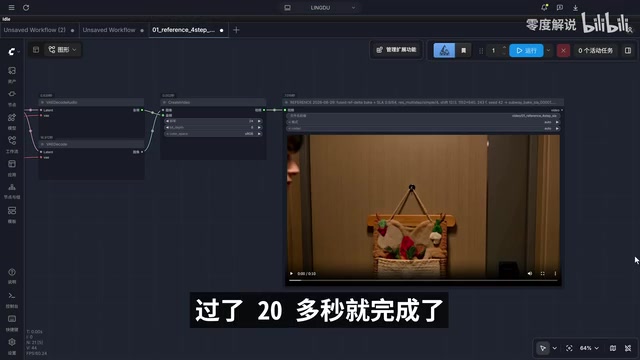
In text-to-video testing, the creator used a GPU with 24GB of VRAM and generated a 10-second video in what felt like seconds — the speed is genuinely impressive. Default sampling steps work fine; video aspect ratio supports both 16:9 landscape and 9:16 portrait, and the rest of the parameters can stay at defaults.
Image-to-video performance is equally strong. After uploading an image and entering a prompt, the generated video handles character consistency and transition details quite well. The creator also generated an animated clip from a Kung Fu Panda screenshot complete with background music, and the result worked right out of the box. The video noted that with more refined prompting, output quality can improve even further.
Why Open Source + Low VRAM Matters
The biggest value of this model lies in stacking three properties together: completely free and open source, very low VRAM requirements, and extremely fast generation speeds. That combination means local AI video generation is no longer exclusive to users with high-end GPUs.
For enthusiasts who love running AI locally, local deployment means your data never leaves your machine, there are no subscription fees, and your creative freedom is maximized — you have full control over what kind of videos you generate. That said, the ultra-low-VRAM version does make some compromises in quality and speed, and the real-world experience on an 8GB GPU will noticeably differ from a 24GB one. Users should set realistic expectations.
Overall, as open-source video models continue to improve in efficiency and VRAM optimization, the barrier to local AI creation is dropping rapidly. For hobbyists willing to put in the setup effort, tools like this already offer substantial practical value.
Related articles
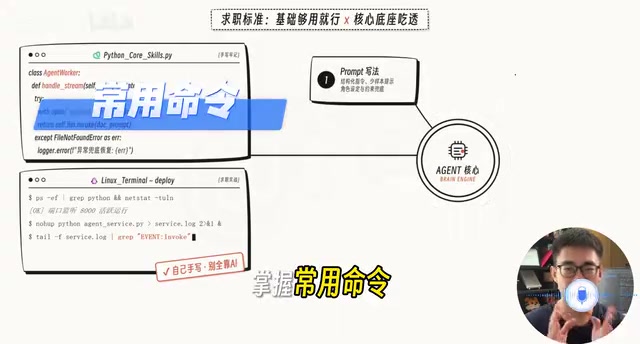
AI Agent Developer Job Hunt Guide: Four Hard Standards to Clear Before You Apply
A practical guide for landing AI Agent developer roles: four measurable standards — project runs, problems debuggable, solution explainable, interviews survivable.
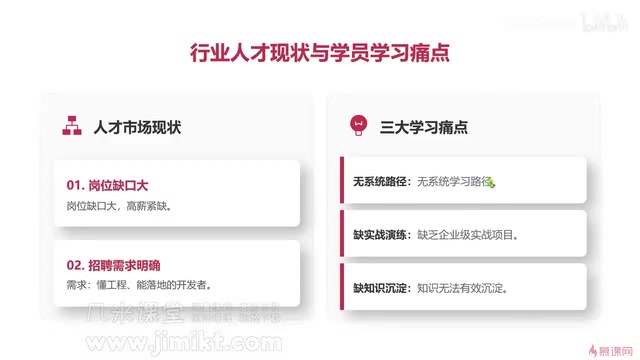
Multi-Agent Development Guide: From Monolithic AI to Team Collaboration in Practice
A beginner's guide to multi-agent development covering core advantages, common learning pain points, enterprise tech stacks, and engineering methodology for AI developers.
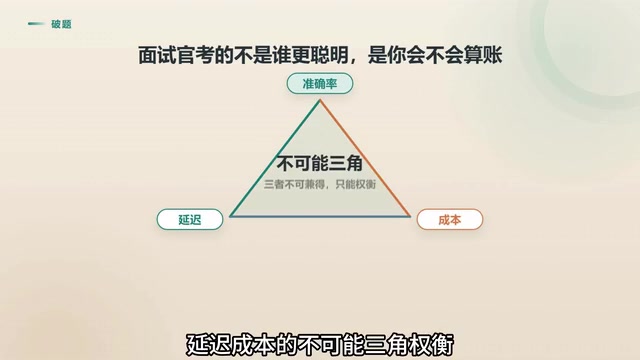
Agent Skill Routing: Retrieval vs. LLM vs. Two-Stage Architecture Compared
Retrieval or LLM for Agent skill routing? Compare coarse-filter vs. fine-select architectures on latency, accuracy, and cost — with 4 key production considerations.