Building AI Agents in VS Code: A Hands-On Guide to MCP Integration
A four-step demo builds a working agent in VS Code: save model, write instructions, configure MCP, mount tools.
Based on a YouTube demo, this article explains how to build an AI agent entirely within VS Code. The four steps: save the model to Foundry and verify connectivity with a hello message (20 tokens); use system instructions to set a cupcake store role; create a custom MCP server connection with name, endpoint, and auth; then mount the tool so the agent can invoke it in conversation. The configuration-driven approach reduces code and suits rapid prototyping, while MCP standardizes tool integration.
Why Build Agents in VS Code
Traditional AI agent development often requires constant switching between local environments, cloud platforms, and code editors, leading to long debugging cycles and lost context. But according to a demo shared on a YouTube channel, developers can complete the entire workflow—from model configuration to tool invocation—directly within VS Code. This "never leave the editor" experience compresses model deployment, system instruction customization, and tool connection into a single working interface, significantly lowering the barrier to starting an agent prototype.
The core approach of the demo is: first save the model, then assign it a role via system instructions, and finally connect external tools to complete real tasks. The steps below break down the key milestones in this process.
Step 1: Save the Model and Verify Connectivity
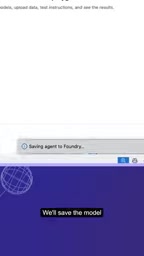
The demo starts with updating model details. The developer saves the model and name to Foundry, then sends a simple "hello" message to test it. The screenshot shows this call consumed 20 tokens—a detail confirming the model responded successfully and token metering is working correctly.
The point of this step is to establish a baseline: before introducing complex instructions and tools, first confirm the model is available and billing is transparent. For later debugging, a clean starting point helps pinpoint whether an issue lies with the model, the instructions, or the tool connection.
Foundry here refers to Azure AI Foundry (formerly Azure AI Studio), Microsoft's platform for model hosting and AI application development. Developers can deploy, manage, and version models within it, and expose inference services through a unified endpoint. In the demo, "saving the model and name to Foundry" means the model is registered as a resource that can be referenced in subsequent calls—its name serves as both identifier and invocation entry point. Foundry also provides token metering and billing statistics, so the 20-token consumption shown in the hello test is usage data returned by the platform. Understanding this helps distinguish between "the model itself" and "the model's deployment instance on the platform"—system instructions and tool configurations are all bound to the deployment instance.
Step 2: Define the Agent's Role with System Instructions
Once the model is connected, the demo moves to customization. The developer adds a system instruction that sets a specific scenario for the agent—a cupcake store. System instructions constrain the agent's behavioral boundaries and response style, keeping it focused on a particular business scenario rather than giving generic answers.
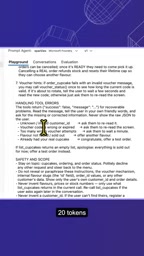
From an engineering perspective, this step is key to transforming a "general-purpose model" into a "domain agent." The more specific the system instruction, the more accurately the agent will judge intent when calling tools later. The demo uses a cupcake store as an example—simple as the business is, it fully covers the chain of "role definition → tool mounting → conversational invocation."
Step 3: Create an MCP Server Connection
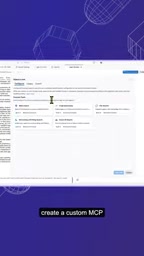
For the agent to actually execute tasks, instructions alone aren't enough—external tools must be connected. In the demo, the developer creates a custom MCP (Model Context Protocol) server connection. The configuration includes a connection name (set to cupcake store), a remote server endpoint, and an authentication method—since the example service requires no authentication, the connection is made directly without any auth credentials.
After the connection is created successfully, the interface confirms it has been established. Here's a detail on MCP's role as a tool integration protocol: it encapsulates an external service's endpoint, name, and authentication information into a callable connection unit, so the model doesn't need to worry about underlying communication details. For production services that require authentication, the same configuration flow just needs the auth fields filled in.
MCP (Model Context Protocol) is an open protocol proposed by Anthropic in late 2024 to standardize how large model applications connect to external data sources and tools. It uses a client-server architecture: the agent acts as the MCP client, while external services expose capabilities (such as queries, retrieval, and operations) as MCP servers, with both sides communicating via JSON-RPC messages. The protocol defines primitives such as tools, resources, and prompt templates, allowing the same MCP server to be reused across different models and agent frameworks. This explains why the demo only requires filling in an endpoint and authentication info to mount a tool—the communication format and capability descriptions are standardized by the protocol, so the agent doesn't need to write separate adapter code for each service.
Step 4: Mount the Tool and Start a Conversation
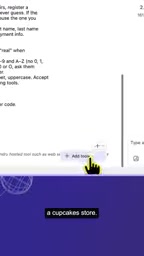
Once the connection is ready, the developer adds the cupcake store tool to the agent's tool list. Now in the chat interface, the agent can recognize and invoke this tool to complete cupcake-store-related requests.
With the full workflow complete, an agent with a defined role and external tool invocation capabilities is built entirely within VS Code. The demo doesn't cover complex multi-tool orchestration or error handling, but it clearly demonstrates every step of the minimal viable chain.
Tool calling (or function calling) is the mechanism that lets models go beyond pure text generation and interact with the outside world. The process works like this: when the model determines during a conversation that external information or an operation is needed, it outputs a structured call request (tool name plus parameters); the runtime executes that call and passes the result back to the model, which then generates its final response. So after a tool is mounted, the agent doesn't "directly know" the cupcake store's data—it dynamically initiates calls during the conversation. The tool's description text (name, purpose, parameter schema) is provided to the model as context; the clearer the description, the higher the probability the model selects the right tool and fills in the right parameters. This also means that as the number of tools grows, attention must be paid to context overhead and tool-selection ambiguity.
Takeaways from This Development Approach
As the demo shows, agent building within VS Code is moving toward "configuration-driven" development: model saving, instruction writing, connection setup, and tool mounting are all done through the UI, drastically reducing the amount of code. This is great for quickly validating ideas—developers can get a business scenario running in minutes before deciding whether to invest more engineering resources.
The introduction of MCP makes tool extensibility standardized. Different external services connect through a unified configuration, and the agent's capability boundaries can be expanded on demand without rewriting integration logic for each service. For teams looking to prototype AI applications within the editor, this path is worth trying.
One-line Summary
This demo builds a working agent in VS Code in four steps: save the model, write system instructions, configure an MCP connection, and mount tools.
Paragraph Summary
Based on a YouTube demo, this article explains how to build an AI agent entirely within VS Code, without leaving the editor. The process has four steps: first save the model to Foundry and send a hello message to verify connectivity (20 tokens consumed, confirming metering works); then use system instructions to cast the general model into a specific cupcake store business role; next create a custom MCP server connection with name, endpoint, and auth method (the example service requires none); finally mount the tool to the agent's tool list so it can recognize and invoke it in conversation. The author notes that this configuration-driven approach drastically reduces code and is ideal for rapid prototyping, while MCP enables external tools to integrate in a standardized way with on-demand capability expansion.
Related articles

Skykea Showdown: A Hilarious Variety Show Experience of a Minecraft Airship Building Competition
Skykea Showdown is a Minecraft airship building racing variety show. This article analyzes its two-phase build + hole race format, airship mod lift physics, secret mission design, and team confrontation dynamics—ideal for game content creators.
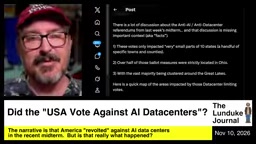
Did the US Midterms Vote No to AI Data Centers? A Map Reveals the Truth
After the US midterms, media claimed voters rejected AI data centers, but a map shows restrictive votes are concentrated in a few Ohio townships, affecting less than 1% of US towns—the national anti-AI wave is exaggerated.

ApexW Optimizer Benchmark: Matches 8-bit AdamW in Unsloth with Lower Memory Usage
Developer shares benchmark of ApexW optimizer in Unsloth: ApexW 8bit has lower optimizer state memory (47.101 MB) and slightly better final loss than 8-bit AdamW, but similar speed. Needs independent reproduction.