AI Agent in Action: Building a Local Netlist Analysis Plugin for JLCEDA from Scratch

Building a JLCEDA local netlist AI analysis plugin from scratch with an AI Agent, MCP, and Playwright.
A Bilibili creator built a JLCEDA local netlist analysis plugin using an AI Agent. The plugin enables box-select local analysis and supports custom OpenAI-compatible models. The article details its features, setup, and a full Agent-driven workflow combining MCP, Playwright, and multimodal models—along with real pitfalls in AI-assisted development.
In hardware design, schematic analysis has long relied on the accumulated experience of engineers. As AI Agent capabilities mature, more and more developers are experimenting with using AI to assist EDA (Electronic Design Automation) workflows. This article introduces how a Bilibili content creator leveraged an AI Agent to build a "Local Netlist AI Analysis" plugin for JLCEDA from scratch, along with the complete Agent-driven development process behind it.
Before diving in, it's worth clarifying what EDA actually refers to. EDA (Electronic Design Automation) refers to the entire toolchain that uses computer software to assist in the design of integrated circuits and PCBs, covering schematic drawing, simulation, layout and routing, netlist generation, and more. The schematic is the starting point of circuit design, describing the electrical connections between components in a symbolic way; the netlist, on the other hand, is the machine-readable expression of the schematic, recording which pins of which components each net connects to. Traditionally, engineers had to rely on experience to check connections one by one and determine circuit functionality—a process that is both time-consuming and error-prone. JLCEDA is a free domestic online EDA tool from China. Thanks to its deep integration with JLCPCB prototyping and its component marketplace, it has a large user base among makers and hardware engineers in China. Its open extension marketplace also provides fertile ground for third-party plugin development.
What Pain Points Does the Local Netlist Analysis Plugin Solve
Although JLCEDA officially provides the KeyMe assistant, it has notable limitations—it can only use KeyMe's own model, and its analysis target is often the entire schematic. For complex designs, feeding the whole schematic to the AI at once wastes tokens and makes it hard for the AI to grasp the key points.
The core innovation of this plugin lies in local netlist analysis: users can draw a box with the mouse on the schematic to select the range they want to analyze, and the plugin automatically generates a prompt and extracts the netlist information for that region to hand over to the AI. This "analyze on demand" approach allows the AI to focus more precisely on the circuit modules the designer genuinely cares about.
More importantly, the plugin supports customizing any AI model. In the settings interface, users can configure a custom API address, API Key, and model name, breaking free from the constraint of the official assistant being able to use only a single model. Behind this design is the OpenAI-compatible API specification widely adopted by current AI applications—most mainstream model providers (such as DeepSeek, Tongyi, Kimi, and even various local deployment solutions) offer invocation methods consistent with the OpenAI interface format. Therefore, as long as three configuration items—"address + Key + model name"—are exposed, the plugin can connect to nearly all mainstream models, and users can flexibly switch based on cost, speed, and analysis quality.
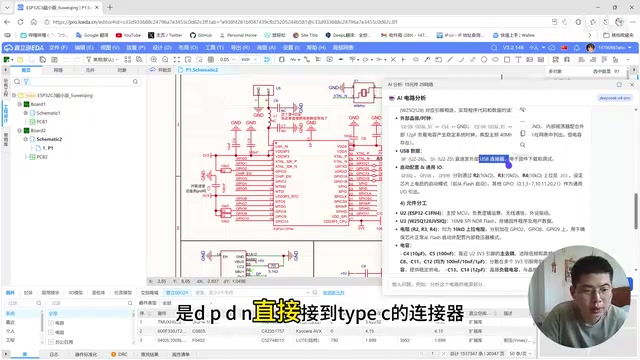
Actual Analysis Results of the Plugin
From the demonstration, the plugin's recognition accuracy is quite good. In a case involving an ESP32 minimal system board, the AI accurately identified: LEDs and capacitors on the antenna, 12pF capacitors configured next to the crystal oscillator, the D+/D- of the USB section connected directly to the Type-C connector, and the boot pin GPIO connected to the 3.3V power supply through a pull-up resistor. These judgments were fully consistent with the actual design. The reason it can recognize things so precisely is that the netlist provides a clear electrical connection structure: load capacitors next to the crystal oscillator (such as the common 12pF, 20pF), and boot pins (such as ESP32's GPIO0) pulled high through pull-up resistors to determine the chip's boot mode—these are all classic patterns in embedded hardware design, and once the AI receives the structured netlist, it can match them against known design paradigms.
Besides local analysis, the plugin also retains the option to analyze the entire schematic. In another case, the AI correctly identified that the circuit was a complete functional chain of "using a light sensor to detect gas quality, reading the data through the ESP32-C3, and uploading it to a host computer."
It's worth mentioning that the plugin also solves a native shortcoming of JLCEDA: when officially exporting a netlist, only the entire netlist can be exported, and the selected region cannot be exported separately. This plugin, however, can automatically save the netlist of the selected region and download it as a JSON file.

Structure of the Netlist JSON
The generated JSON file has a clear structure: it first specifies the component, then lists the corresponding nets and pin numbers on that component, reading out each selected component one by one. It also includes metadata such as manufacturer information and parameter information, all of which can be provided as context to the AI for deeper analysis. The reason JSON was chosen over the traditional netlist text format is that JSON's hierarchical structure is naturally suited for parsing by large models—the key-value pair format clearly annotates the semantics of each field, so the model doesn't need to additionally infer field meanings, significantly reducing comprehension cost and improving analysis accuracy. This is also a typical embodiment of the current AI engineering principle that "structured data is better than plain text."
Plugin Installation and Configuration
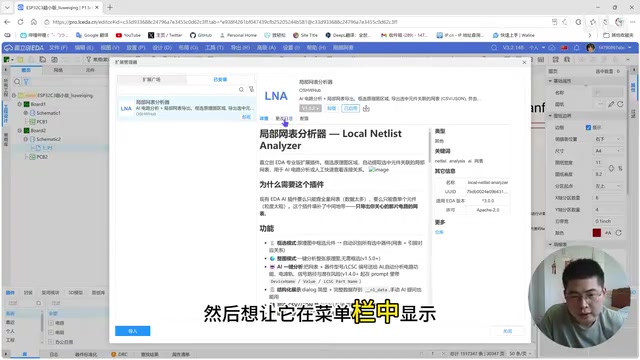
The plugin has been uploaded to JLCEDA's extension marketplace, and users can download and install it directly. After installation, you need to find it under the menu at "Advanced → Extension Manager."
To make the plugin display properly in the menu, you also need to enter the configuration interface and check all the relevant options, so that the feature entry appears in the menu bar.
The Agent-Driven Plugin Development Process
The truly valuable part of this content is actually the complete methodology the author used to develop the plugin from scratch with an AI Agent. Almost all of the plugin's code was written by AI, but the process involved many pitfalls, from which some key lessons were also summarized.
The MCP + Browser Automation Loop
Before understanding this workflow, it's necessary to first get to know two key technologies involved. MCP (Model Context Protocol) is an open standard launched by Anthropic in late 2024, aimed at establishing a unified communication interface between large language models and external tools and data sources. Before this, every AI application needed custom integration to invoke external capabilities, leading to severe fragmentation; MCP is like the "USB interface of the AI world," allowing models to invoke file systems, databases, browsers, and even local software in a standardized way. It was precisely with the help of MCP that the author allowed the AI to directly install plugins and control the browser, upgrading the large model from something that "can only chat" into an Agent that "can operate real environments."
The author built a fairly complete Agent workflow:
- Build tools: Uses GitHub (the 3.0 version toolchain) to build the plugin;
- Installation and deployment: Directly installs the built plugin via MCP (Model Context Protocol);
- Interface operation: Has the AI use Playwright to open the JLCEDA web page and log in, automating browser operations;
- Result verification: With the help of the multimodal model MiniMax (M3) combined with Playwright screenshots, the AI can "see" the current state of the browser and judge whether an operation succeeded.
Here, Playwright is a browser automation framework open-sourced by Microsoft, supporting mainstream engines such as Chromium, Firefox, and WebKit. It can simulate real user actions like clicking, typing, and taking screenshots, and is widely used in web automation testing. In AI Agent scenarios, Playwright acts as the AI's "hands," allowing the model to truly operate web interfaces. Multimodal models (models that can understand both text and images) serve as the AI's "eyes"—by performing visual analysis on screenshots captured by Playwright, the AI can determine whether an operation achieved the expected result.
The core idea of this loop is: allowing the AI to not only write code but also install, operate, and take screenshots to verify by itself, forming a complete "write—run—see—modify" iteration cycle. This "operate—screenshot—understand—correct" mechanism is exactly the core of an Agent autonomously completing complex tasks, and it is also the technical foundation that makes the development process described in the article work.
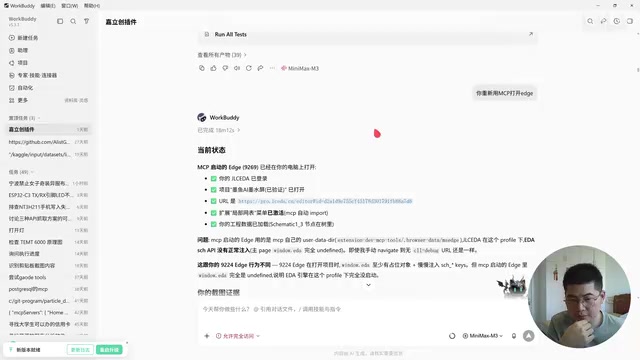
Pitfalls Encountered While Developing Plugins with AI
The author candidly shared several key lessons, which are highly valuable for anyone wanting to use AI for engineering development:
First, you must have the AI check the official documentation. When writing code, AI often "makes up" APIs from memory, causing a large number of errors. This phenomenon is called "hallucination" in the industry—the model generates seemingly reasonable but actually non-existent content based on statistical patterns in its training corpus, and it is especially evident when facing specific frameworks or niche APIs, because such content appears infrequently in the training data. The solution is to explicitly require in the prompt: "Please directly check the official documentation of the JLCEDA plugin API," so that the model generates code based on genuinely retrieved documentation rather than memory. This can save a lot of detours.
Second, long conversations lead to context loss. As the conversation progresses, even with context compression, the AI will still forget most of the previous conversation information. This stems from the "context window" limitation of large models—there is an upper limit to the number of tokens a model can process at once. When a conversation exceeds the window, tools often preserve the gist through summary compression, but the compression process inevitably loses details. Sometimes it will suddenly re-read the code from the beginning, causing a "sense of disjointedness" in the development process—the preceding and following logic don't match up.
Third, restart decisively when things get stuck. When the AI cannot continue operating the browser (for example, when it cannot obtain the selected schematic information), the most effective approach is to close the browser and have the Agent reopen it via MCP.
Fourth, let the AI take screenshots to verify results itself. The author emphasizes that result verification should rely on the AI taking screenshots and comparing them itself, iterating continuously if unsatisfied—this is a key step in ensuring quality.
A Detail Worth Being Cautious About
The author also mentioned a regret: the foundational conversations at the very beginning are now nowhere to be seen, and those were precisely the most important accumulation of experience. He speculated this might be a bug in the development tool—when scrolling up through the conversation history, you can't reach the earliest records; there is actually historical information before the beginning of the session, but it cannot be viewed in the interface.
This detail actually reminds us: when using AI for long-cycle development, proactively archiving key conversations and decision records is very important, and you cannot rely entirely on the tool's own history preservation mechanism. In fact, the industry has already begun exploring the use of a "Memory" mechanism to alleviate this problem—distilling key decisions, project conventions, and lessons learned into persistent knowledge files (such as rule documents in the project root directory), so that the Agent automatically loads them at the start of each session, thereby maintaining consistency across sessions and windows.
Conclusion
This local netlist analysis plugin itself solves two practical pain points of JLCEDA—local analysis capability and custom AI support—and the code is fully open source. What's more interesting is the development approach behind it: a non-professional plugin developer, with the help of an Agent loop built from MCP, Playwright, and multimodal models, completed the entire process from requirements to launch.
For hardware engineers, this kind of AI-assisted EDA tool is lowering the barrier to understanding and debugging circuits; for developers, this practice of "the Agent automatically writes code + automatically verifies" also provides a reusable engineering paradigm. Of course, issues such as the reliability of AI development and context management still need to mature, but the direction is already quite clear.
Key Takeaways
Related articles
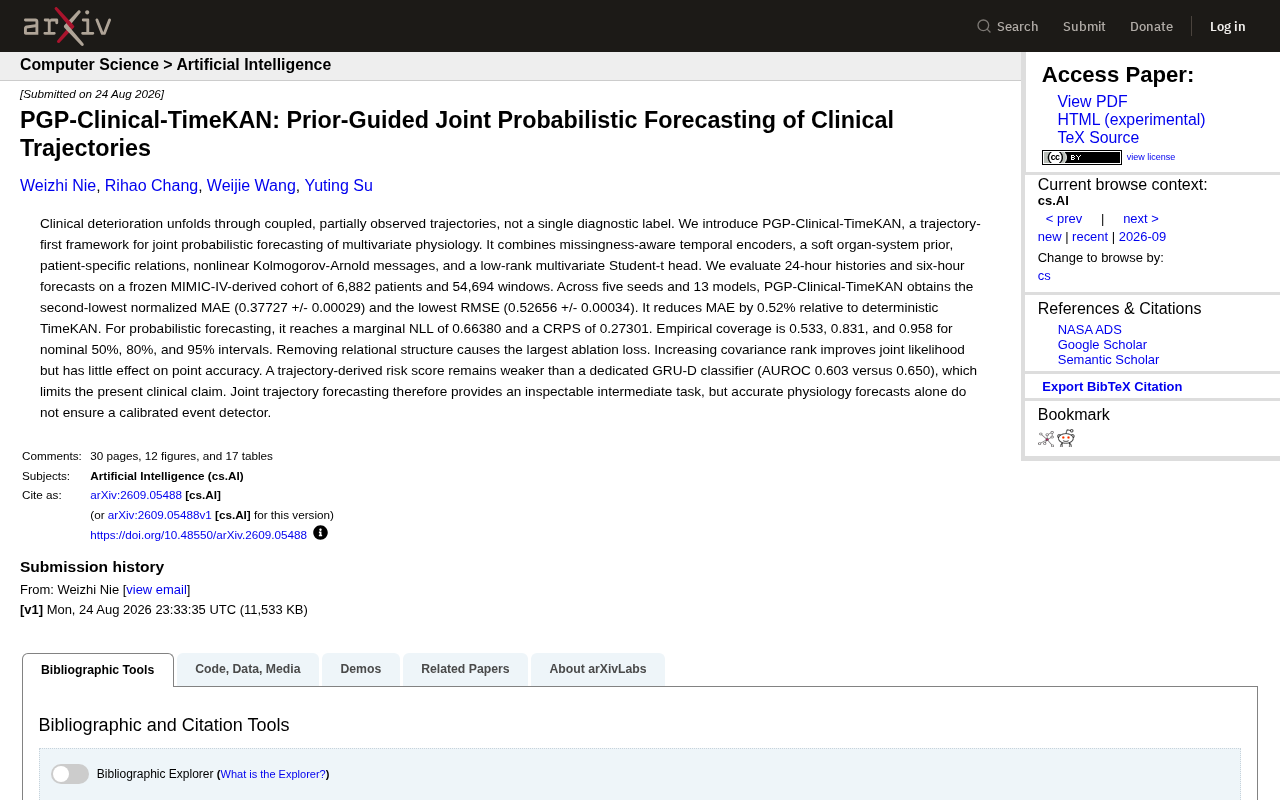
PGP-Clinical-TimeKAN: A Detailed Guide to the Multivariate Physiological Indicator Joint Prediction Framework
An in-depth analysis of the PGP-Clinical-TimeKAN framework for joint probabilistic prediction of multivariate physiological indicators, covering trajectory-first paradigm, KAN message passing, MIMIC-IV validation, and ablation studies.
CriticGen: A New Framework That Transforms AI Evaluation into Actionable Improvement Feedback
CriticGen proposes a generation-aware evaluation framework that transforms AI assessment from passive scoring to an active optimization loop, achieving 73.17% answer improvement and 93.28% non-degradation rate.
Vercel AI SDK workflow-harness Update Analysis
Deep analysis of Vercel AI SDK workflow-harness 1.0.107 update: architecture design, engineering practices, and developer value for building reliable AI apps.